

Youtube to Notion | Export your Views, Likes, Comments & Favorites
As a YouTuber, staying on top of your video stats is crucial for growth, but manually tracking data is time-consuming. What if you could automatically gather your YouTube stats into Notion for a more streamlined workflow? In this tutorial, I’ll show you how to connect YouTube to Notion using Google Developers Console and Make (formerly Integromat).
You’ll learn how to pull vital performance metrics such as views, likes, dislikes, comments, favorites, and organize them directly in Notion. With this integration, managing your video analytics becomes simpler and more efficient.
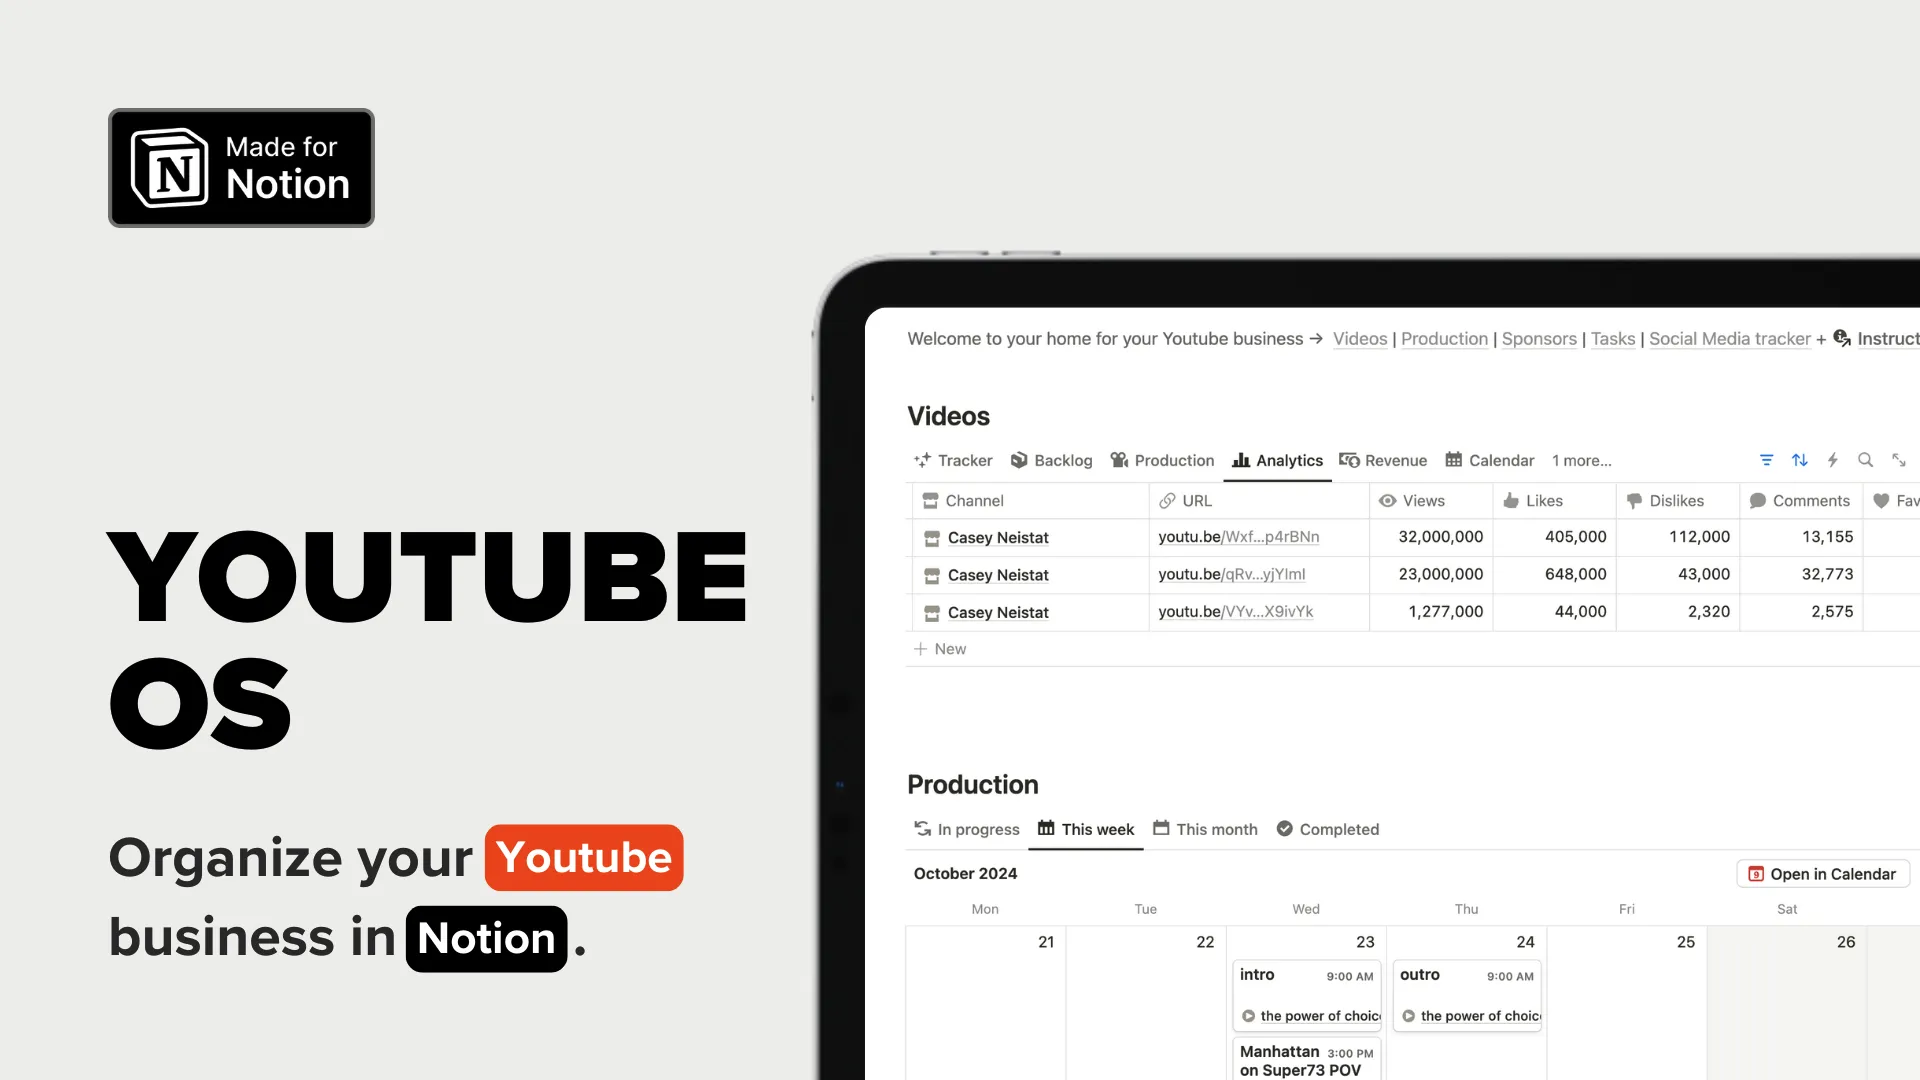
Before we dive in, I'd like to mention that you can organize your entire YouTube business in Notion using the YouTube OS Notion template. This complete workspace allows you to manage your channels, videos, sponsors, production, social media, finances, and much more — all in one place.
Key Takeaways
- The integration process involves setting up Google Developers Console and using Make (formerly Integromat) for automation.
- Essential steps include creating a Notion database for video stats, enabling YouTube Data API, and setting up OAuth credentials.
- The Make scenario consists of four main modules: Notion (search), HTTP (API request), JSON parsing, and Notion (update).
- Regular scheduling of the automation ensures up-to-date video statistics in your Notion workspace.
Notion Environment
If you already have a Notion database where you track your videos, great! Just make sure that you have a property for your video ID and for each of the stats you wish to track.
If you don’t, here’s what you need to do:
- Create a new Notion database
- Create number properties for each of your stats (views, likes, dislikes, comments, favorites)
- Create a text property for your video IDs
Pro tip: you can go even further by extracting the ID from your YouTube video url automatically thanks to a formula. Assuming the url property is called “Video URL”, you can use the following formula: replaceAll(replaceAll(Video URL, "^.\\?v=", ""), "&.$", "")
If you want to get started faster, you can also duplicate my example database here.
Google Developers Console
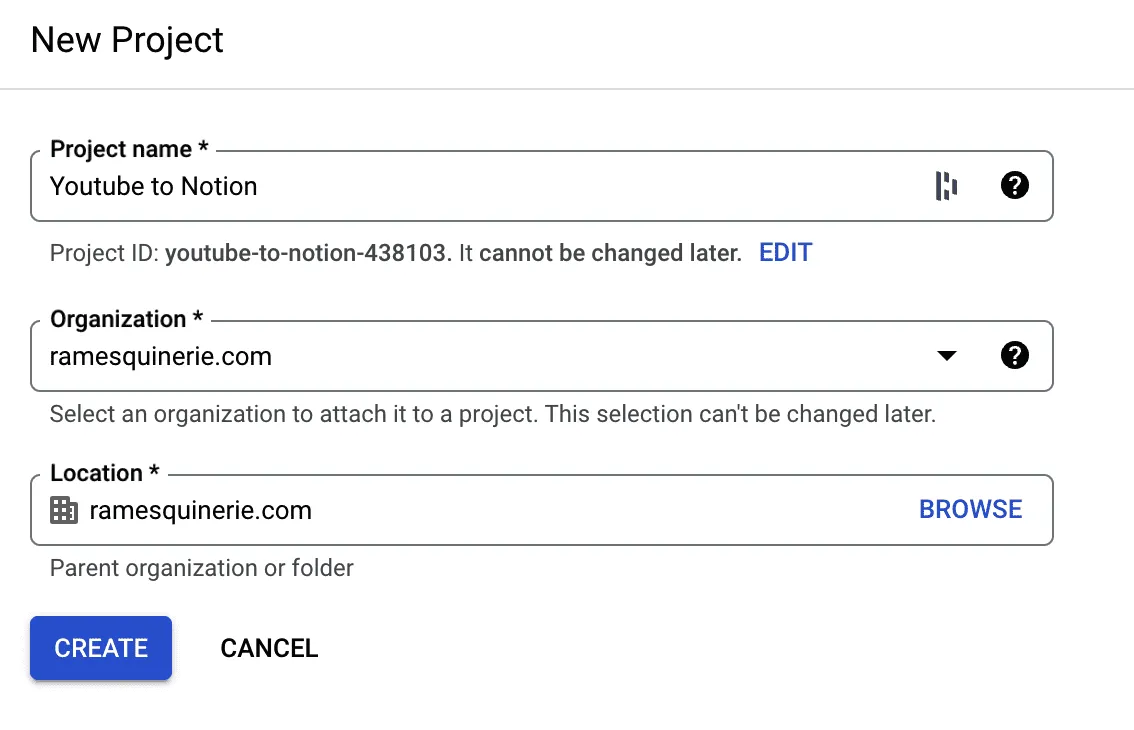
1/ Create a new project in Google Developers Console & call your project Youtube to Notion
2/ Fill out the project details (Project Name → YouTube to Notion)
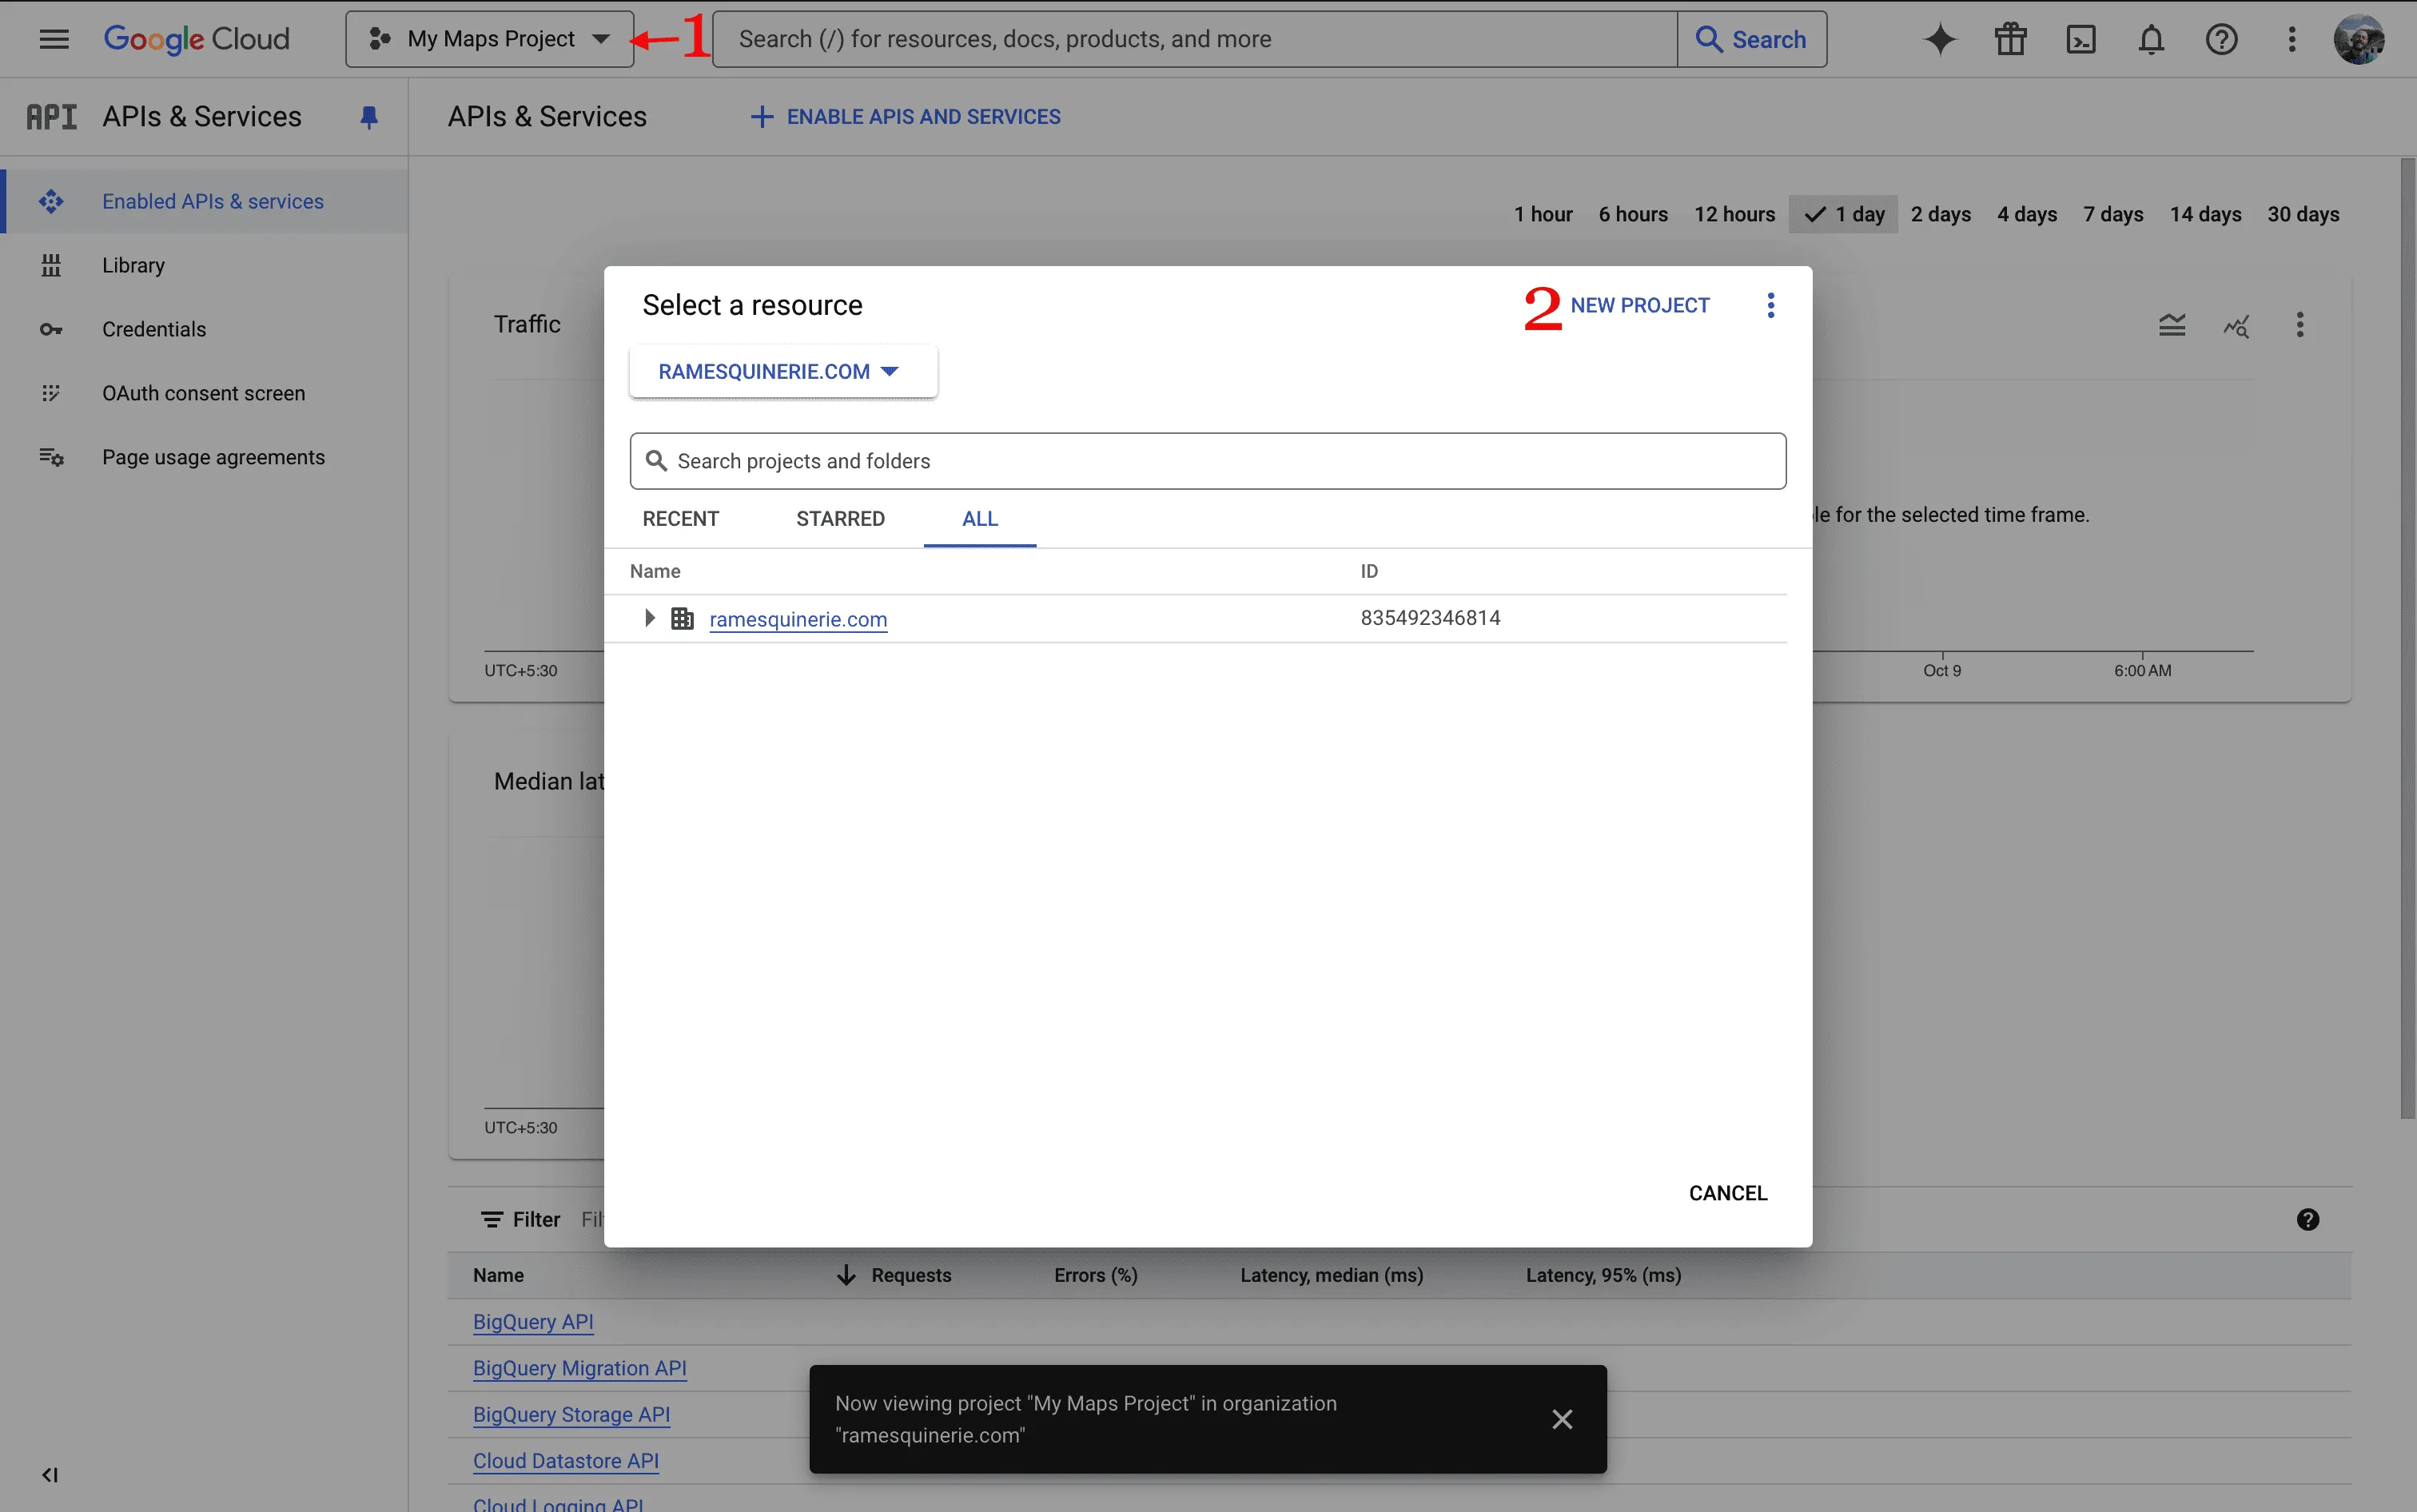
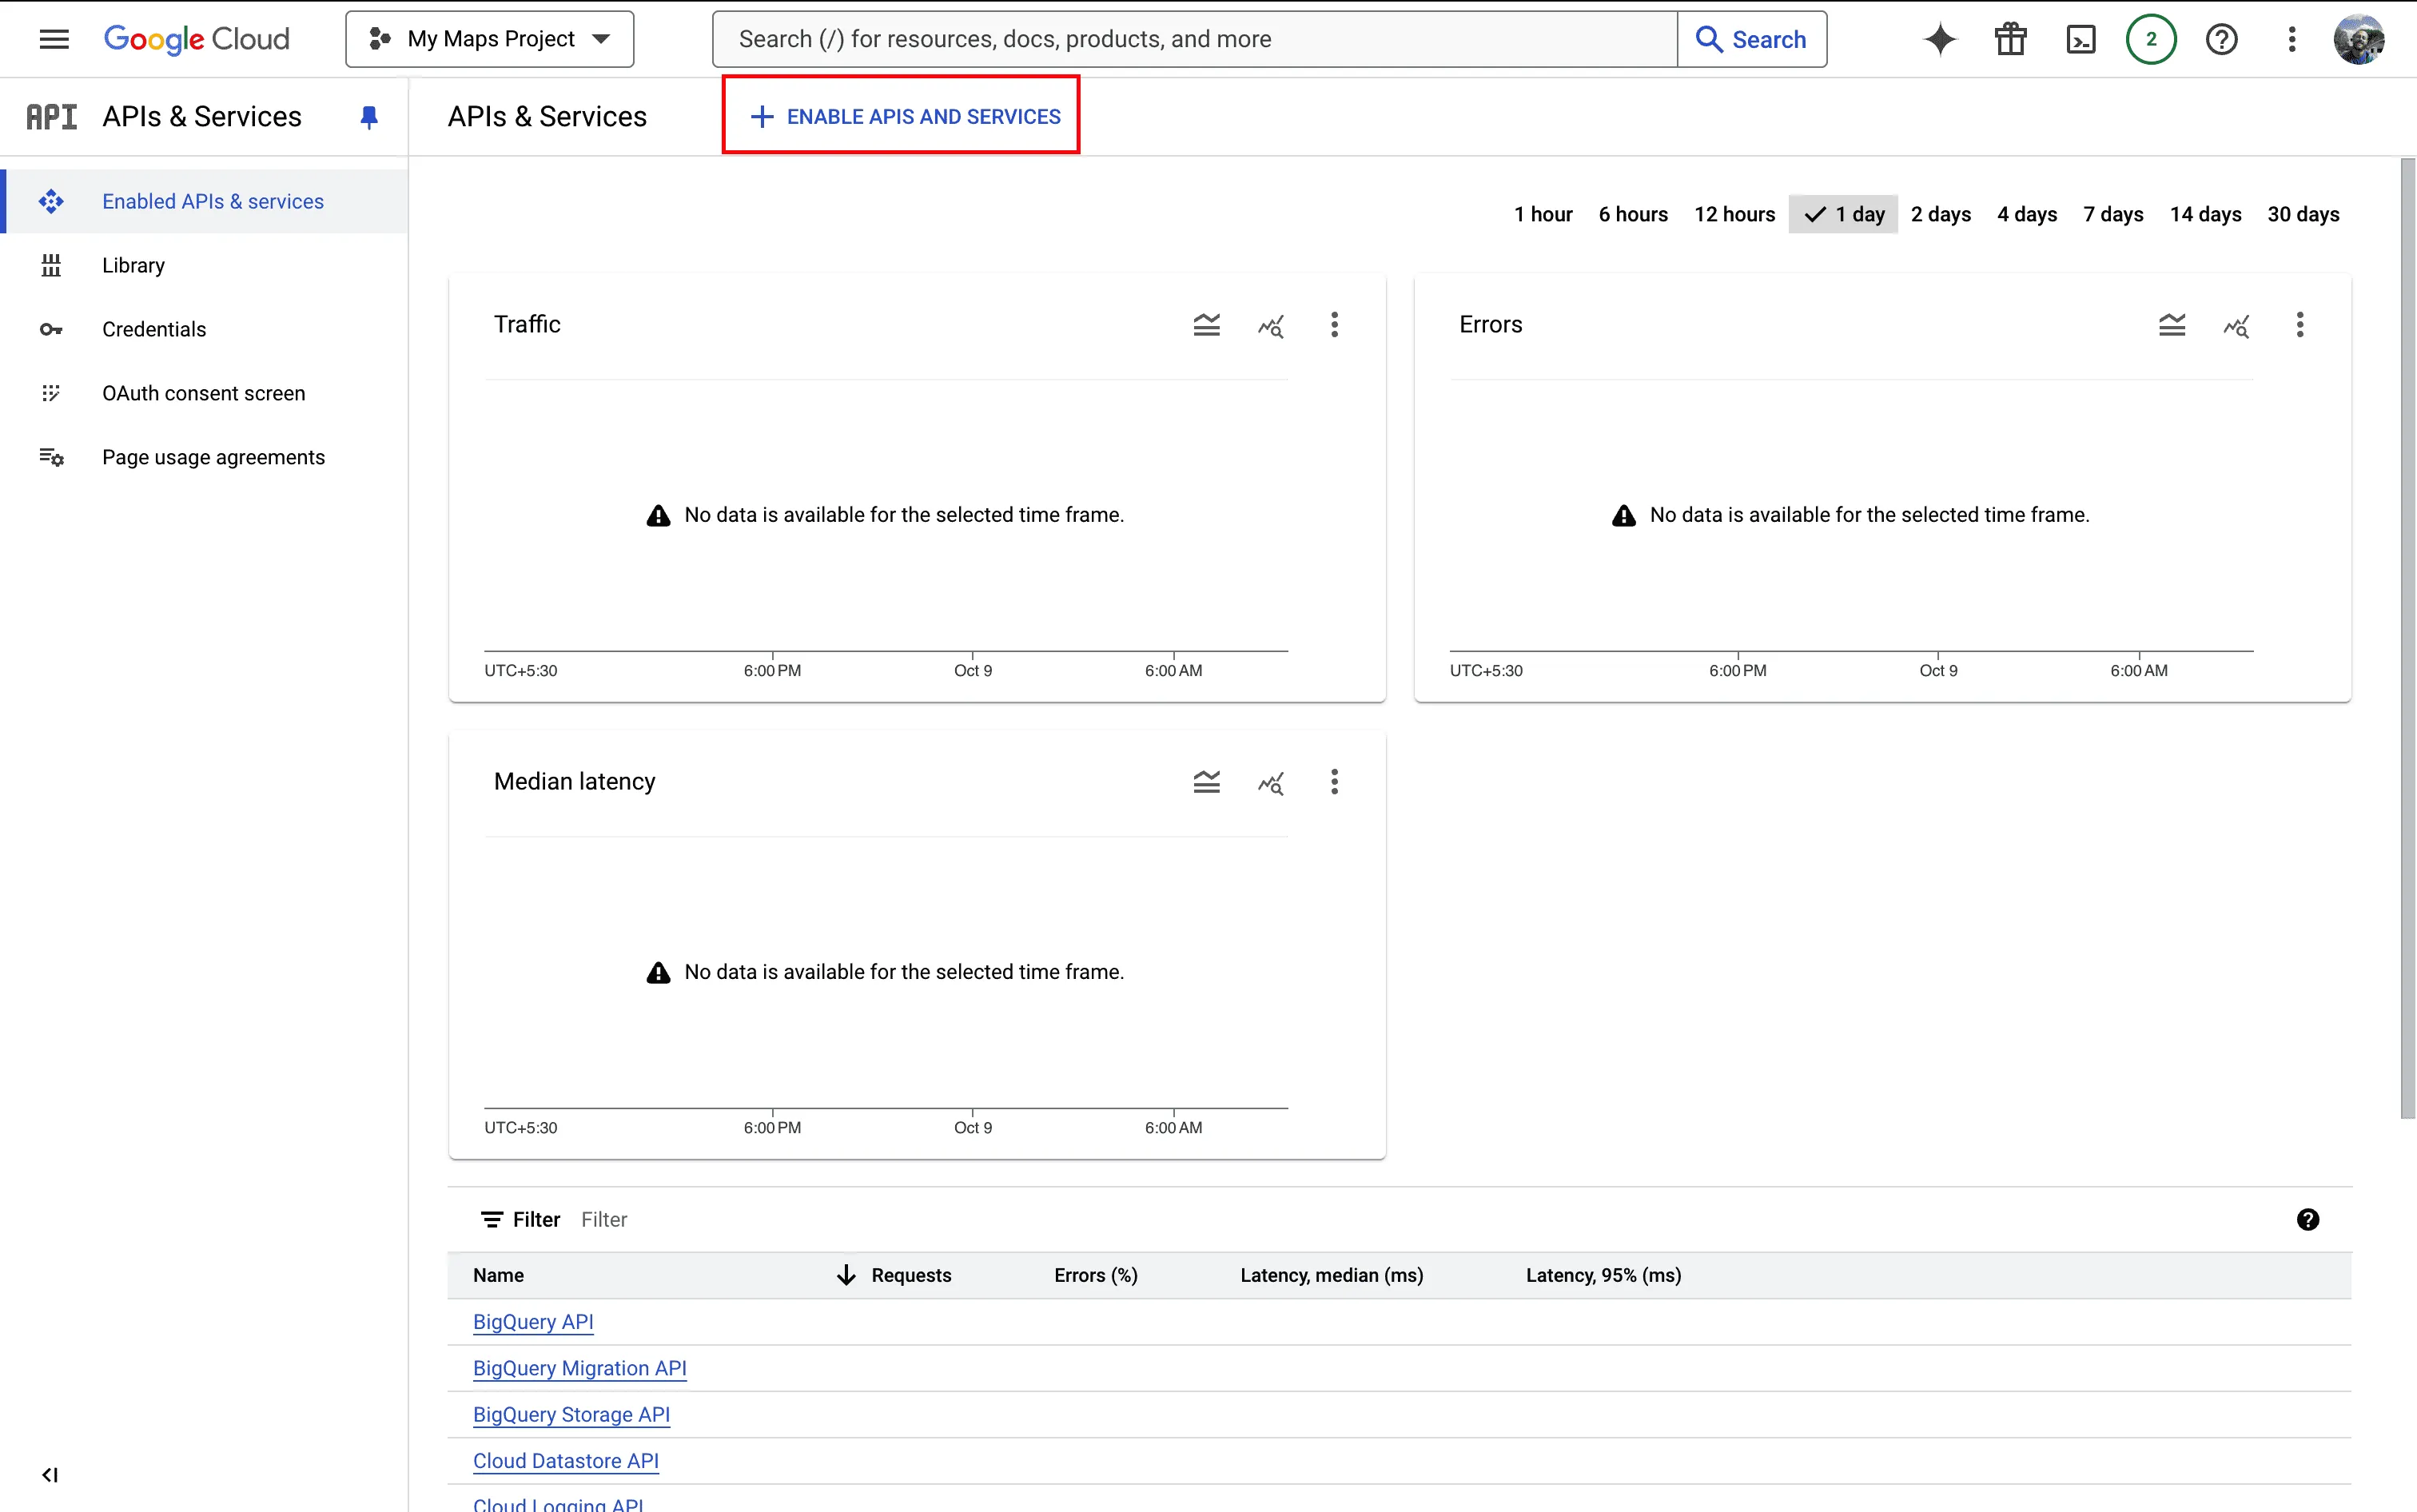
3/ Go to “Enabled APIs & Services” in your sidebar
4/ Click Enable APIs & Services
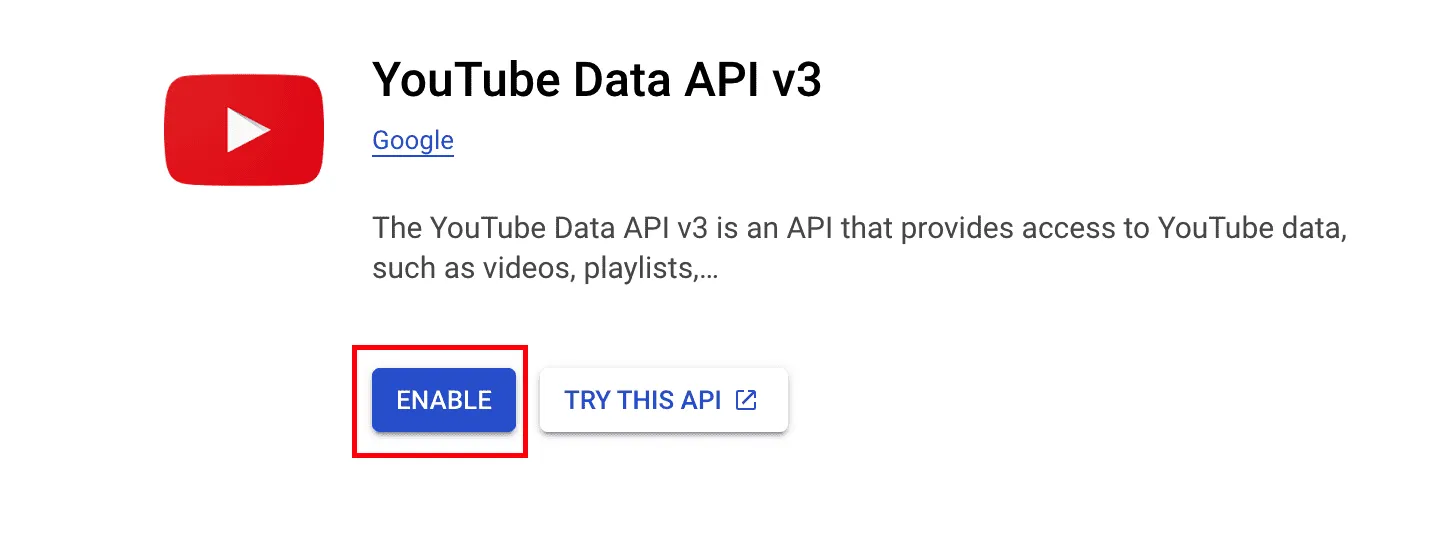
5/ Search for “Youtube Data API v3”

6/ Click on YouTube Data API v3 → Enable
Make sure you’re on the right project (“Youtube to Notion”) at the top of your page
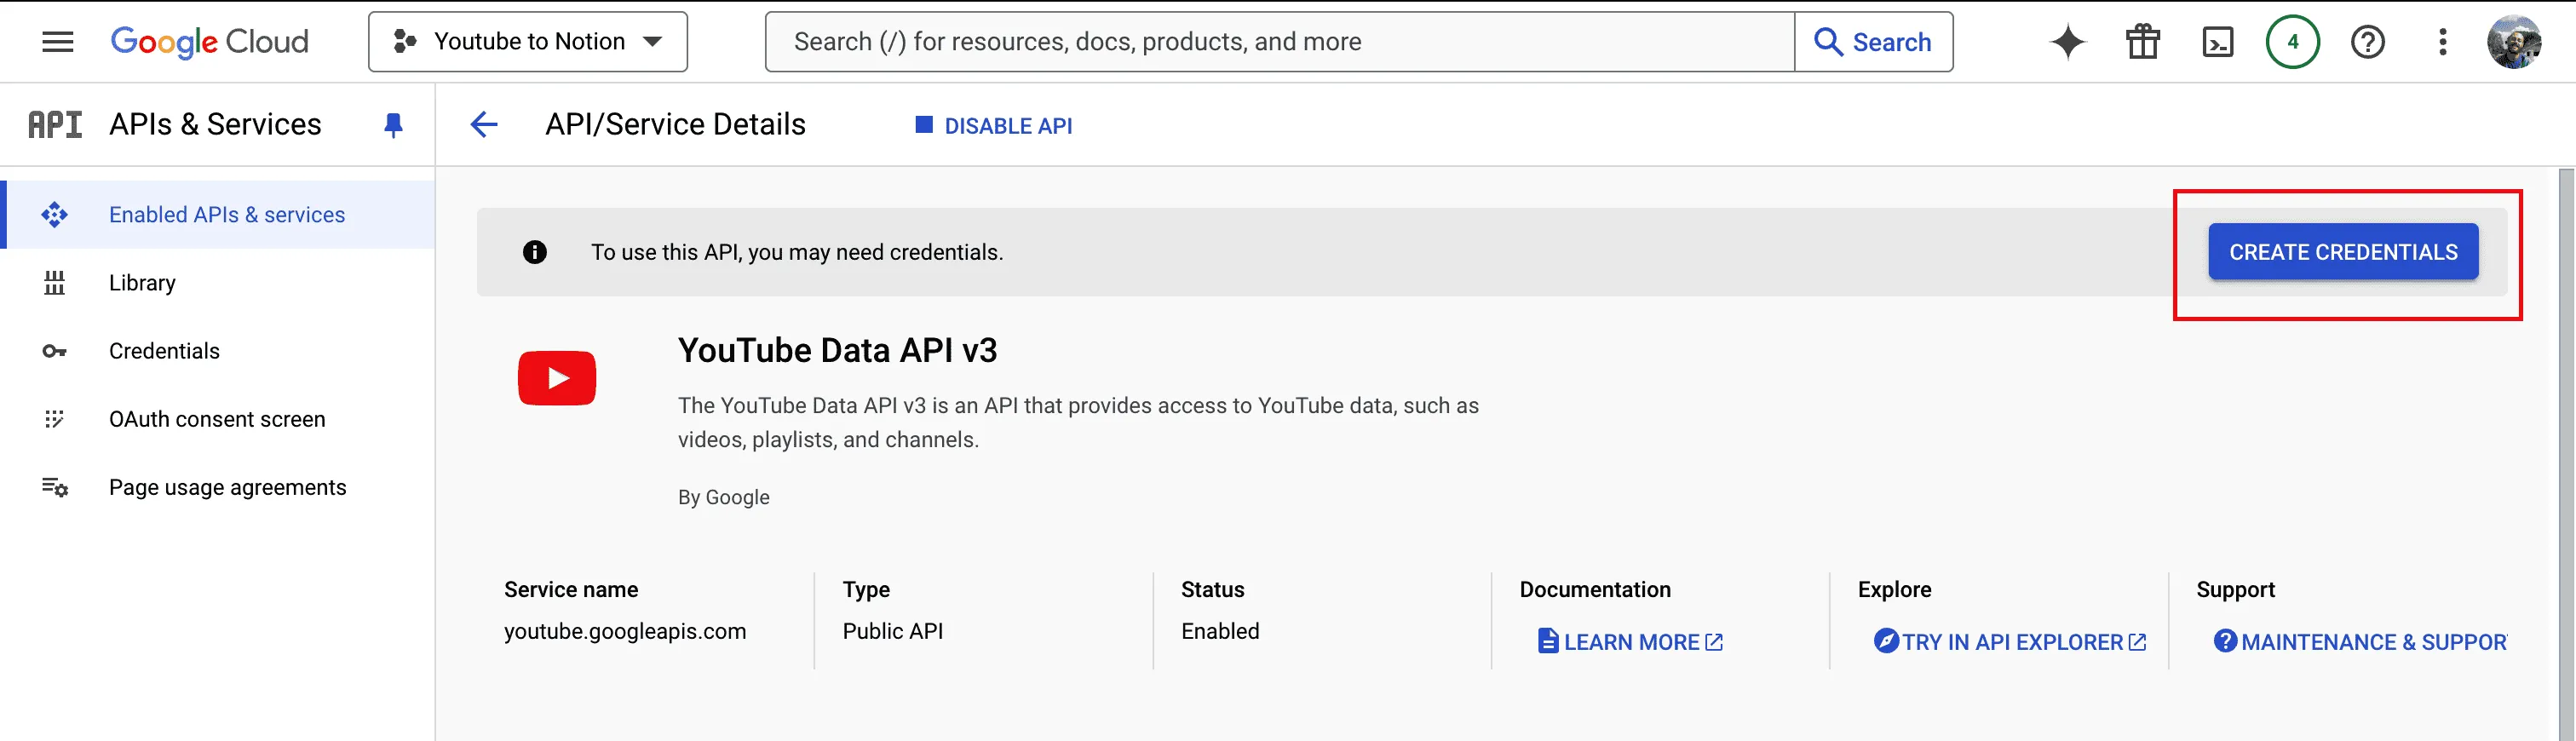
7/ Click Create credentials
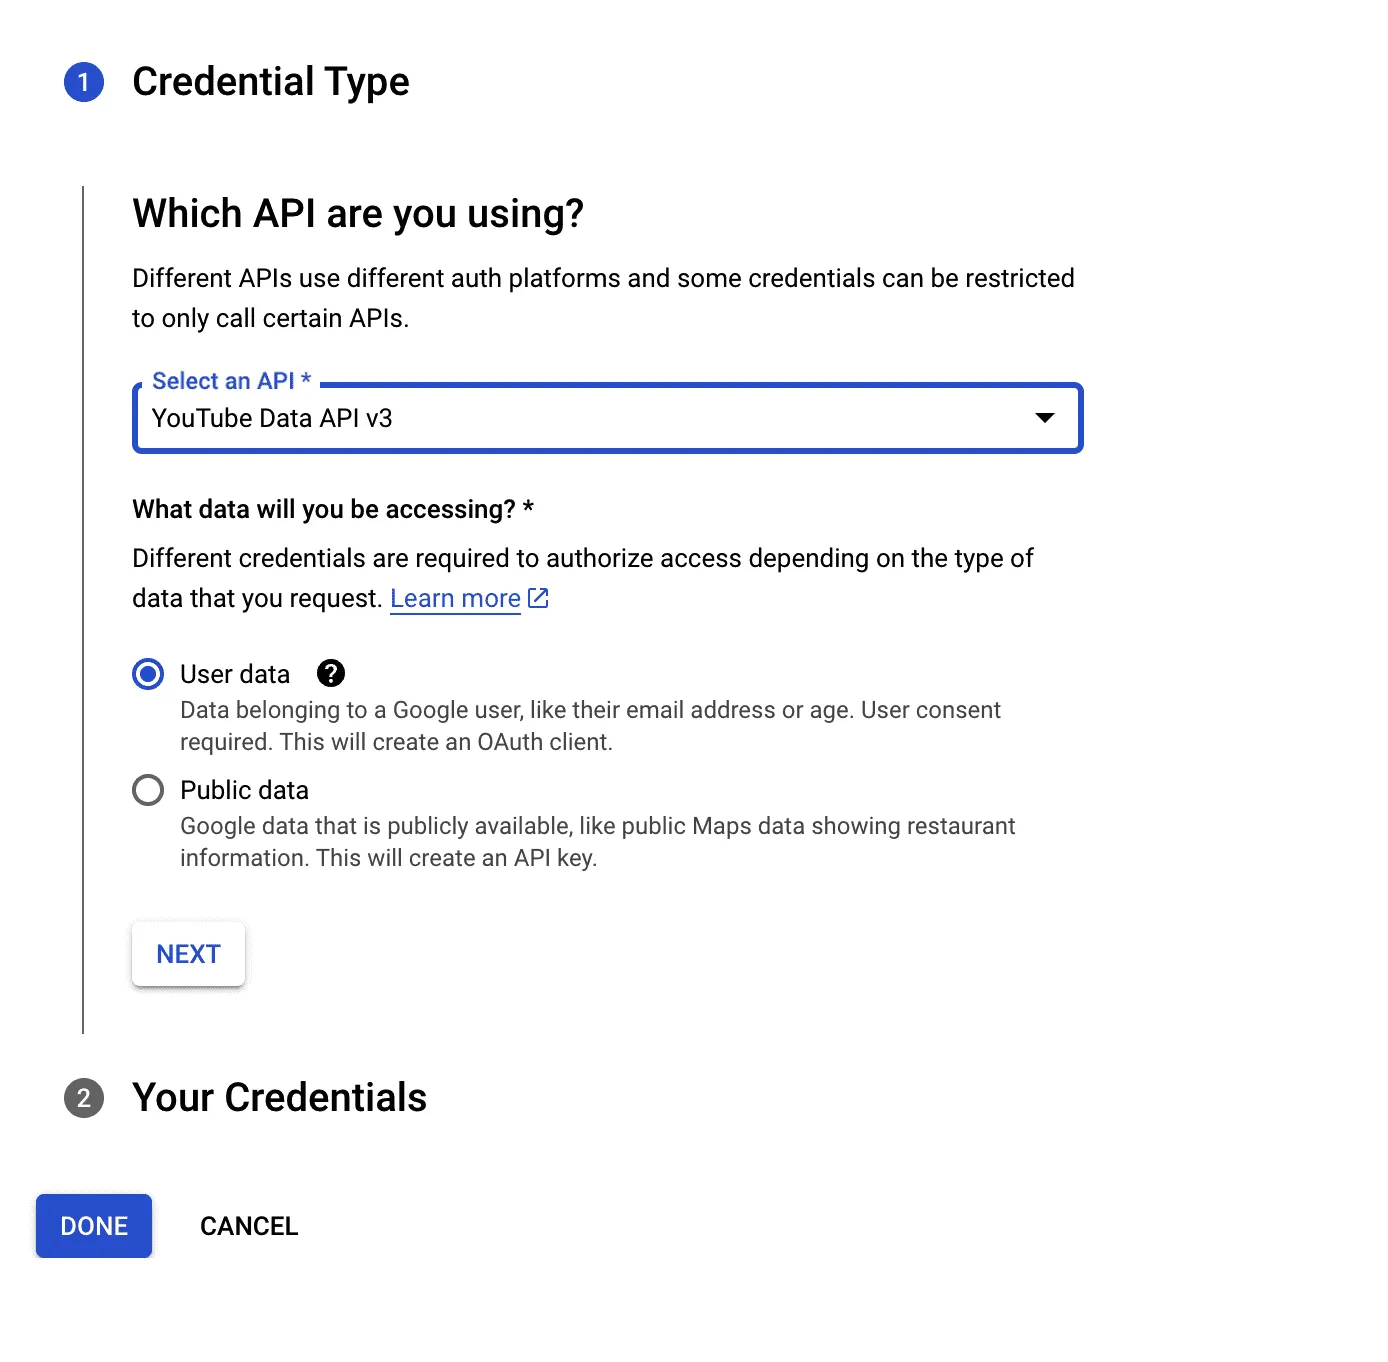
8/ Select “User data”
9/ Name your app "YouTube to Notion", add support email and contact info
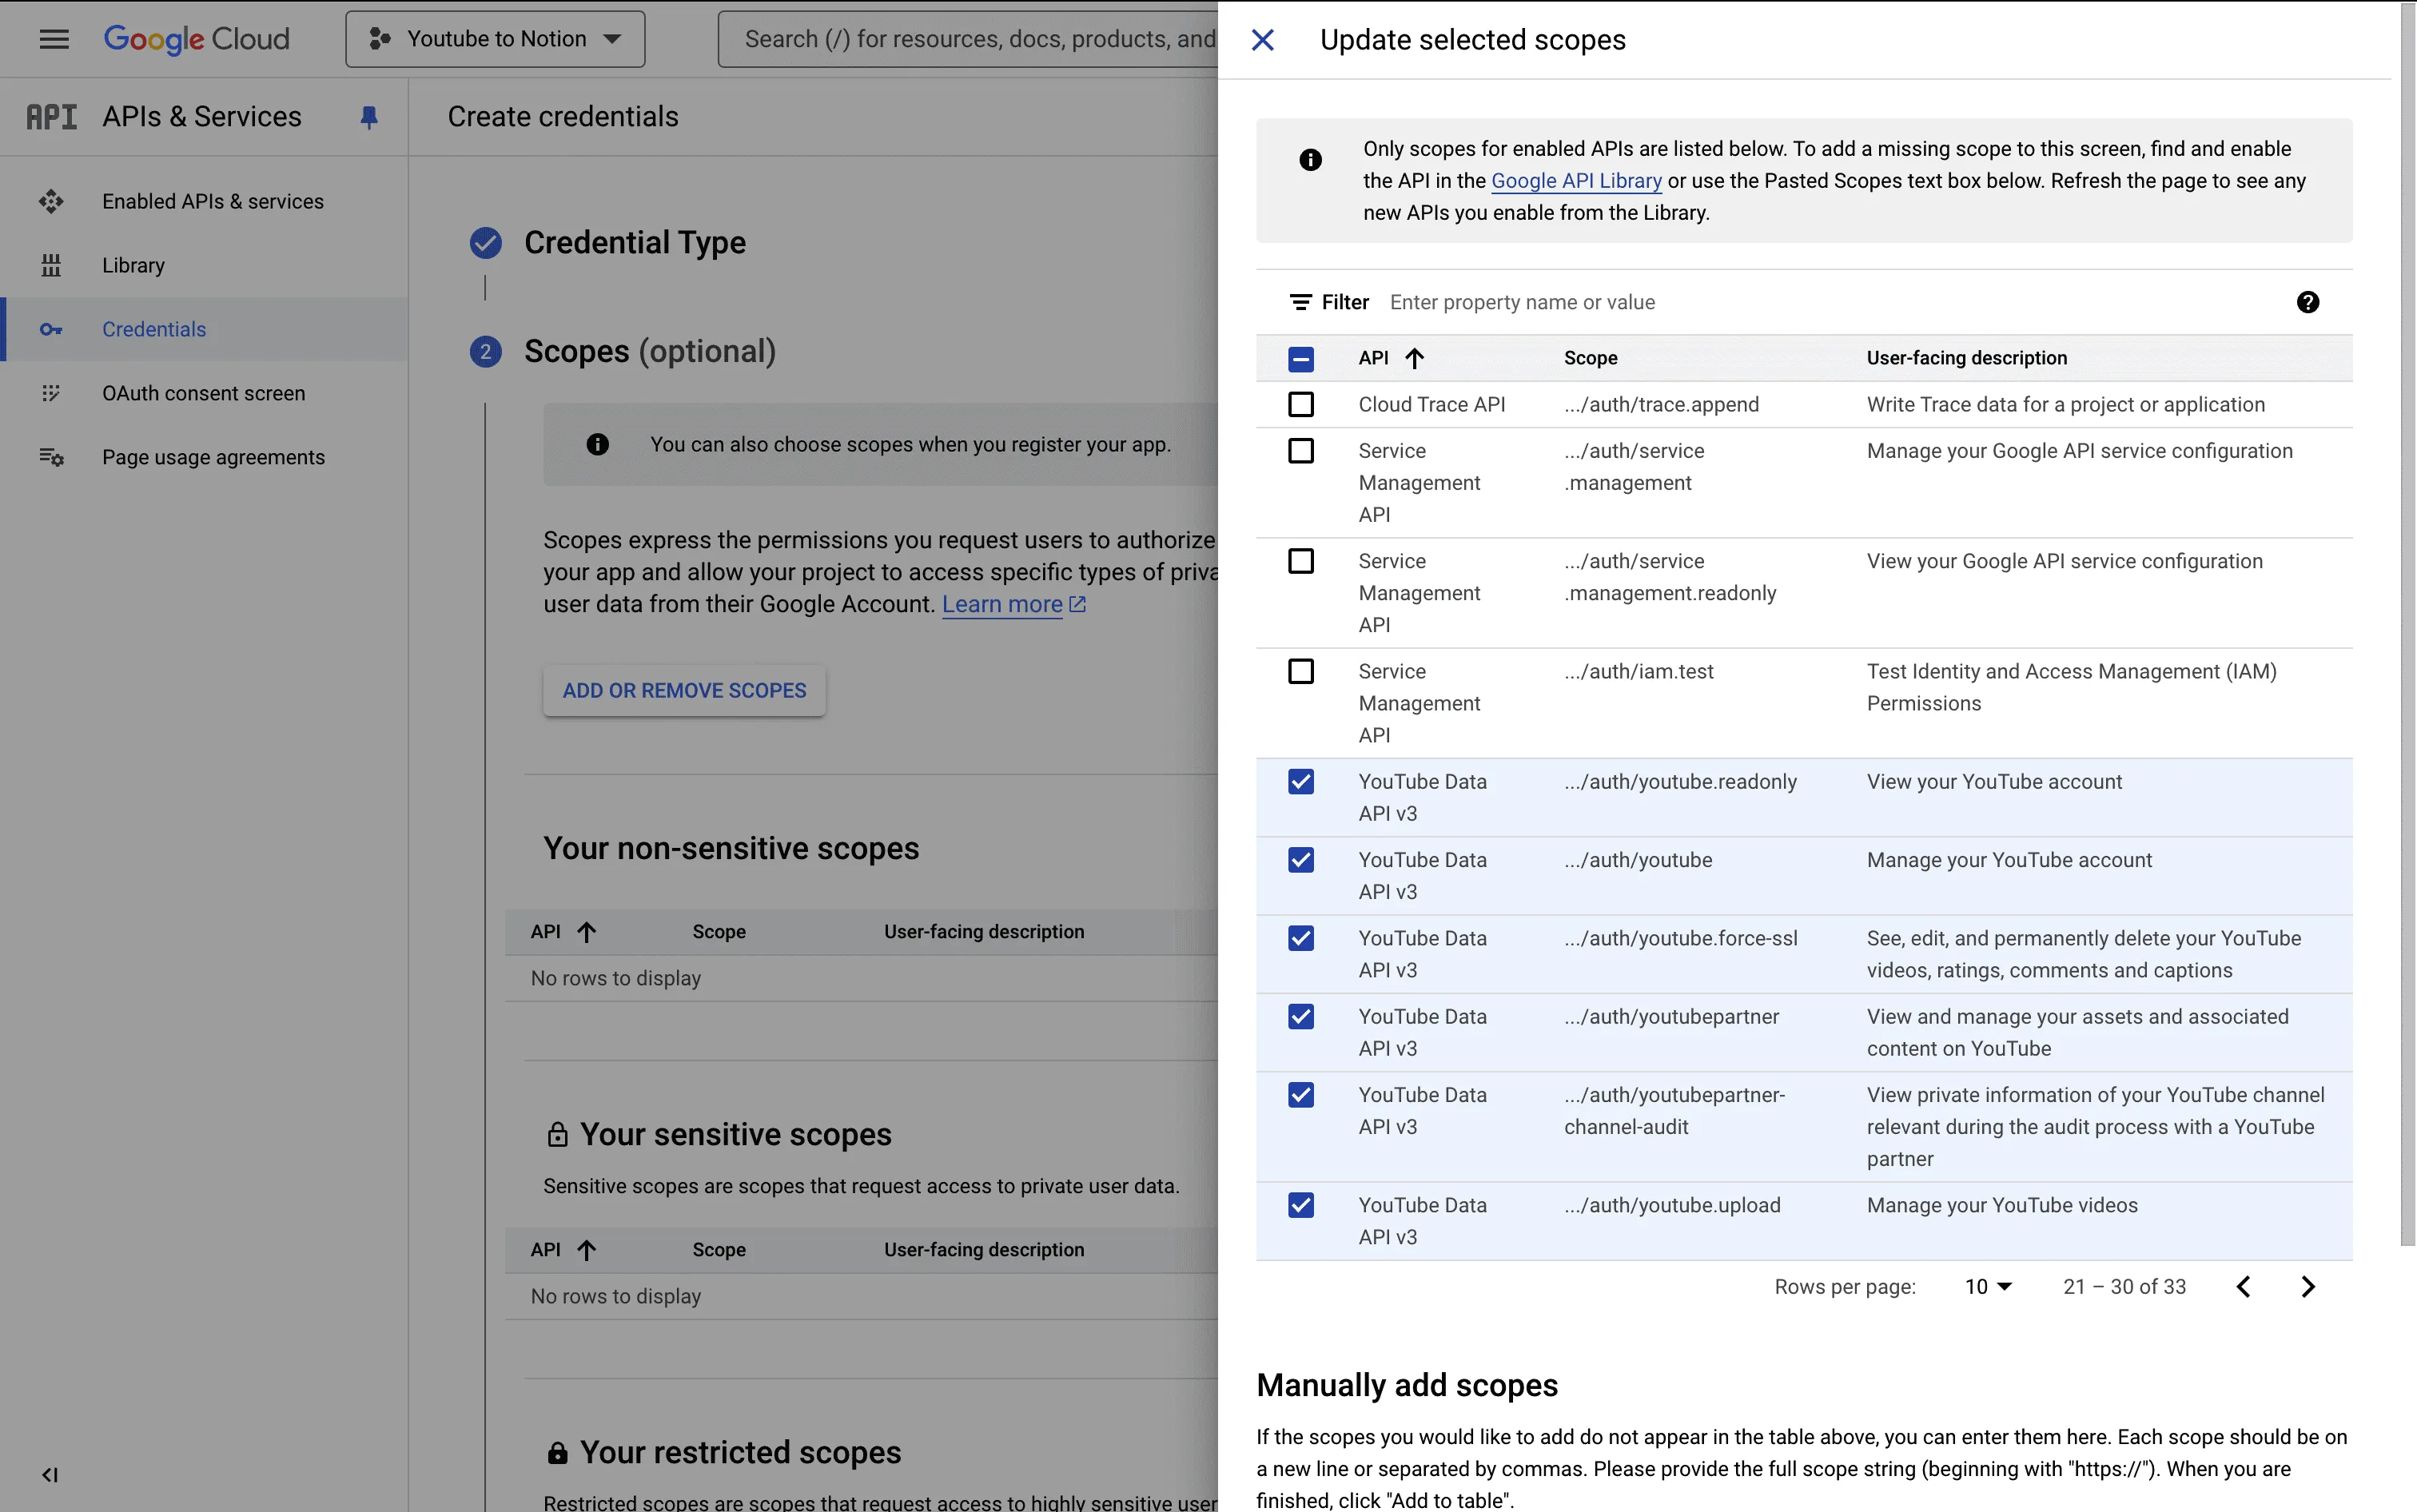
10/ Click Add or remove scopes
11/ Select all scopes from YouTube Data API v3 from the list, then click Update
12/ Click Save & Continue
13/ Application type → Web application, Name → Web client, then click Create
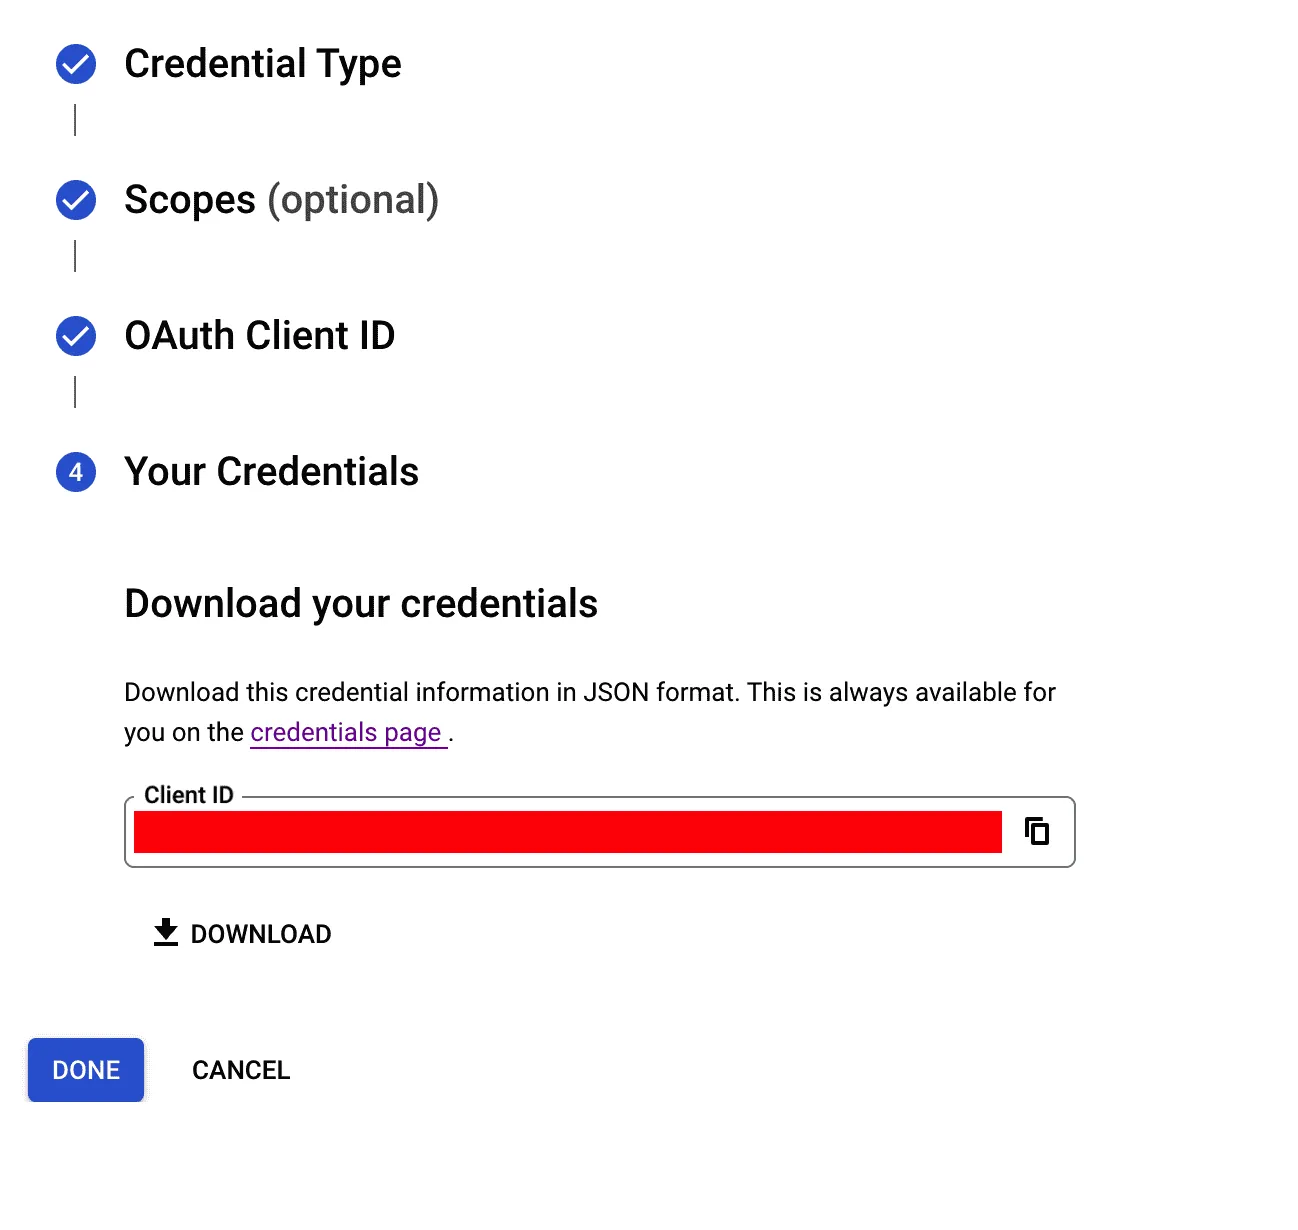
14/ Copy your Client ID and store it somewhere safe
15/ Go back to Credentials in your sidebar, then click the pen icon to edit your OAuth client
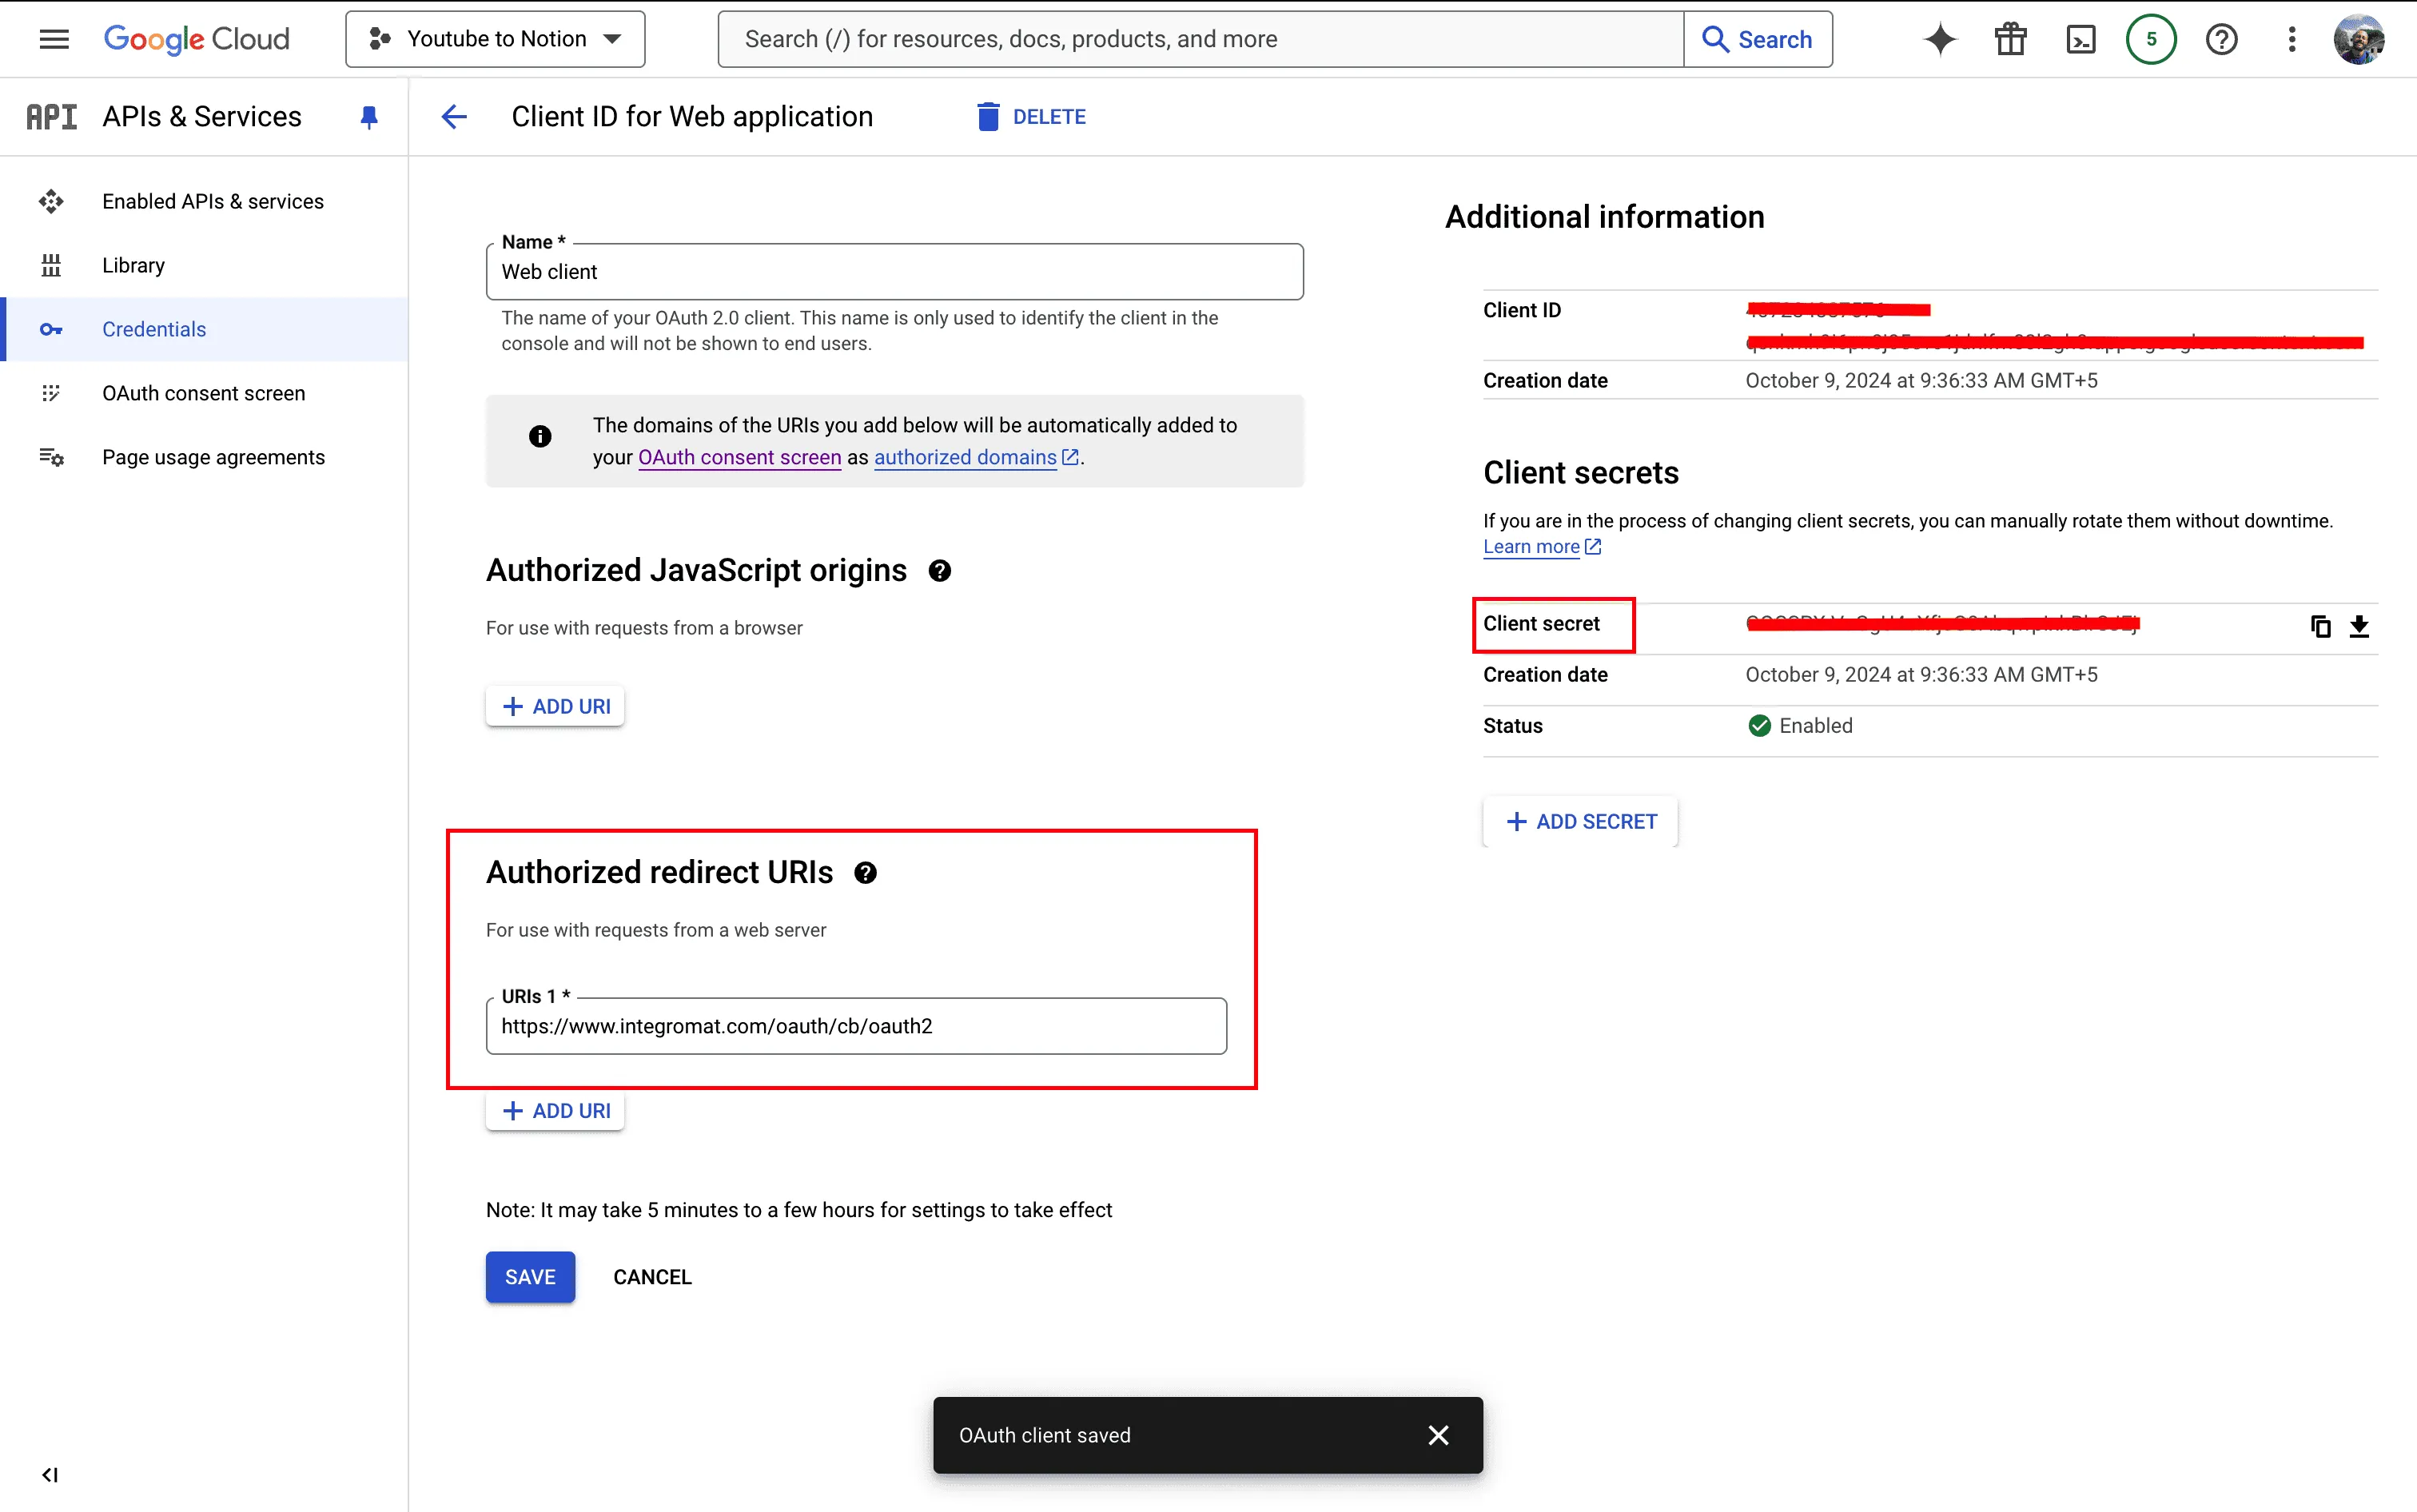
16/ Copy your Client secret key and store it somewhere safe
17/ Click Add URI beneath "Authorized redirect URIs" and paste: https://www.integromat.com/oauth/cb/oauth2
18/ Click Save
Great! We've completed the Google Developers Console setup. Now, let's move on to building the actual automation!
Make
- If you don't have one already, create a Make account
- Go to Scenarios → Create a new scenario
- Name your scenario YouTube to Notion
Module 1: Notion
1/ Select Notion → Search Objects as first module
2/ If you've never used Make before or never connected Notion, click Create a connection
- Follow the steps and make sure to select either all your Notion pages (from your workspace) or the parent page where your YouTube videos database is nested
3/ Fill out the fields
- Search objects: Database items
- Database ID: input your database ID or search for your database using the Search button
- Keep the filter empty, unless you want to retrieve the stats of certain videos only (then you'll have to filter on the corresponding Notion fields)
- Limit: leave it on 1 for now
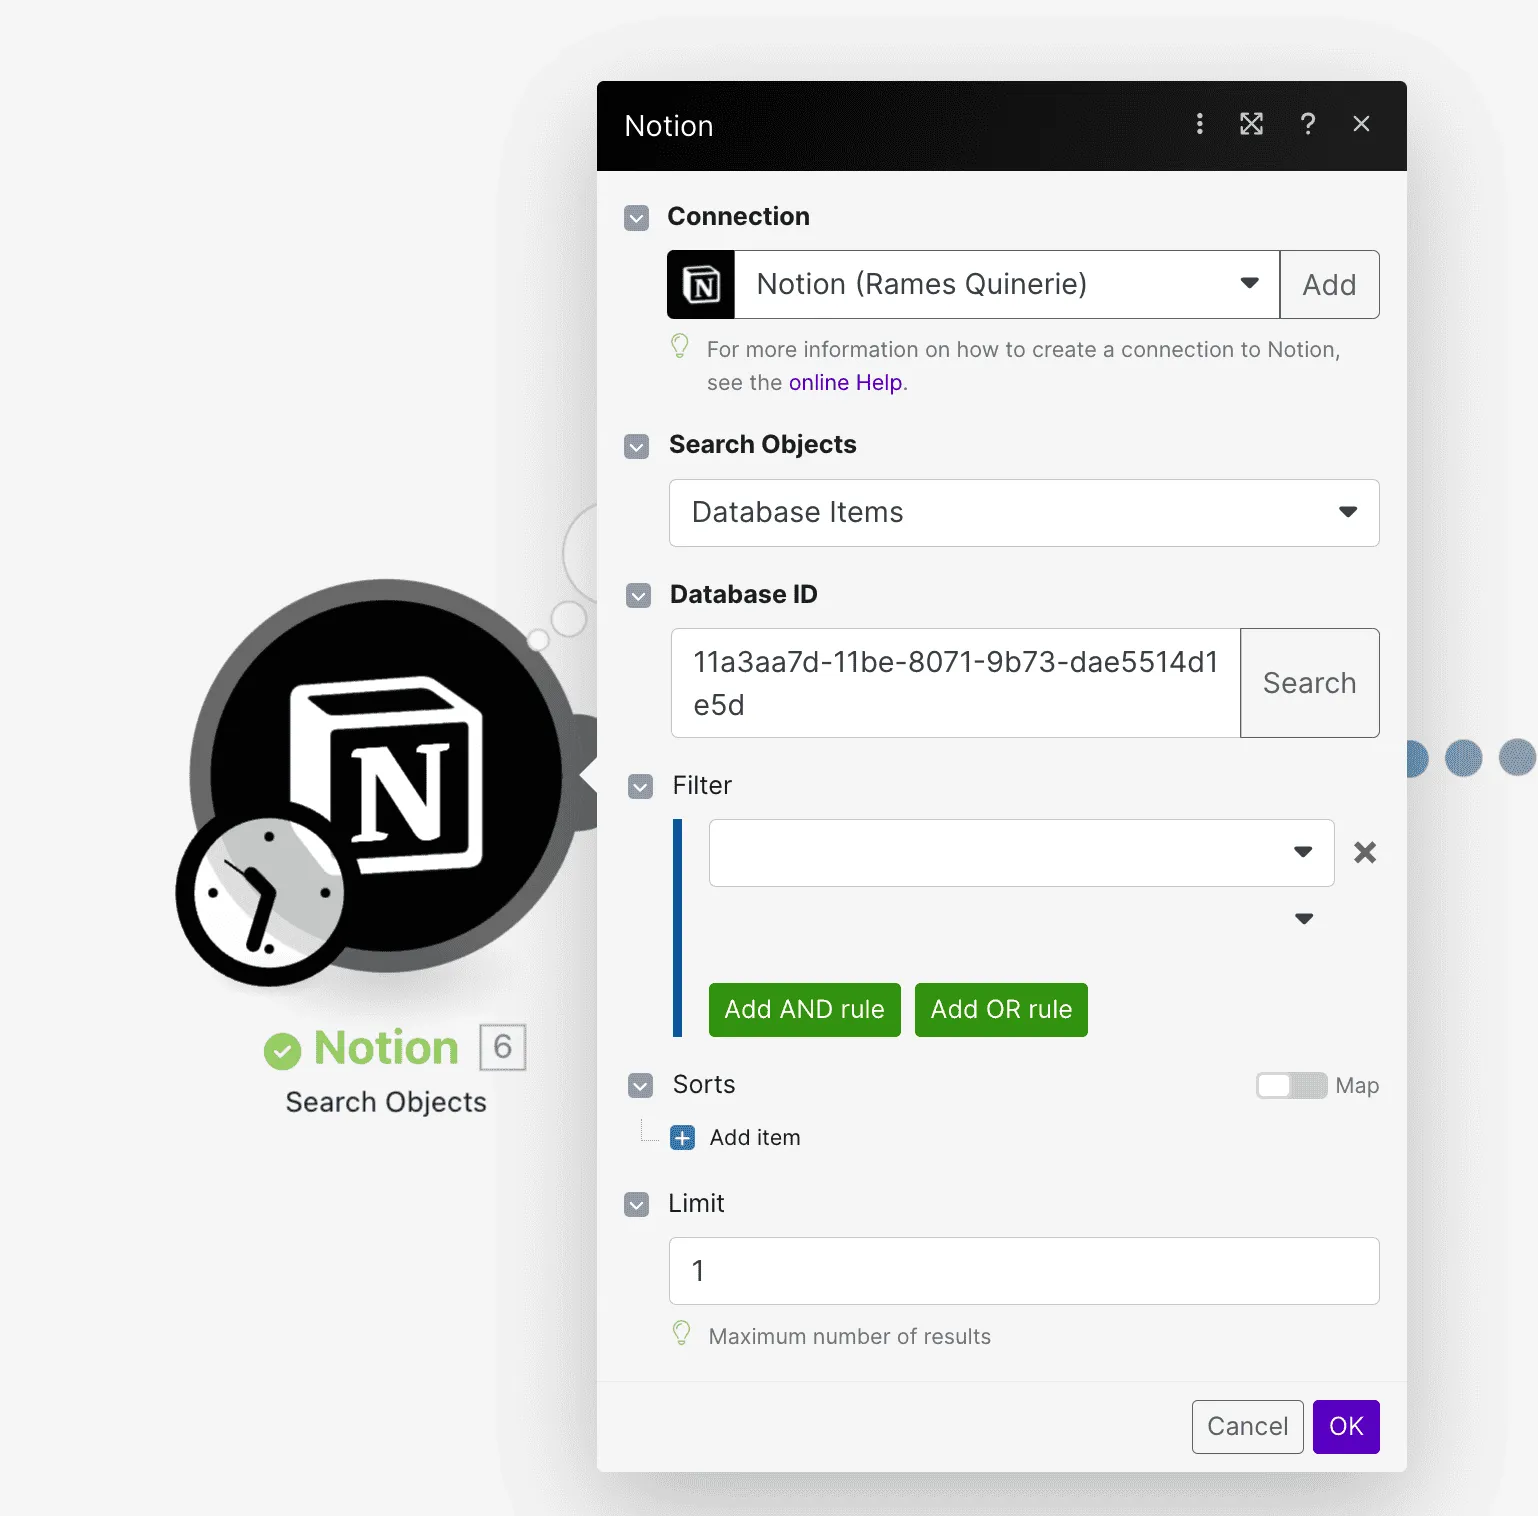
4/ Click OK
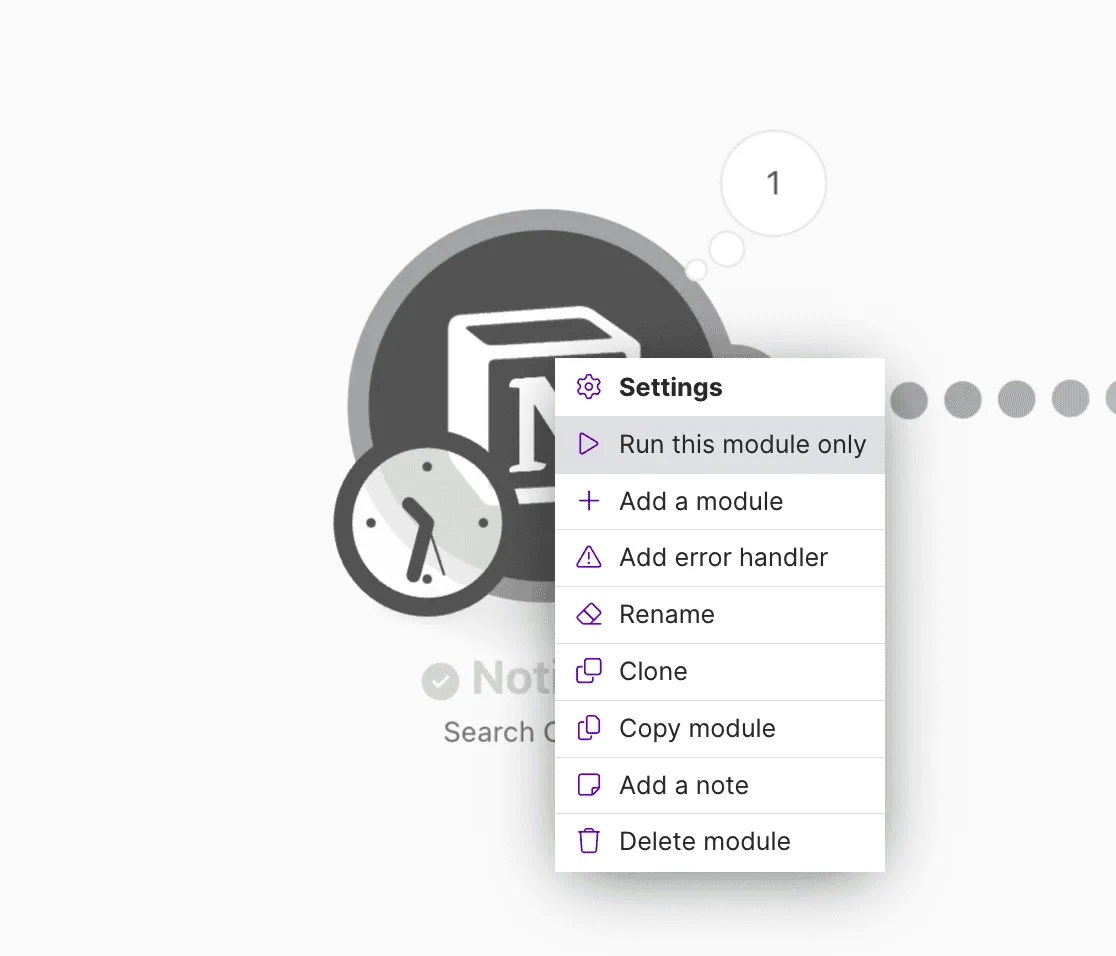
5/ Right-click the Notion module and select Run this module only
Module 2: HTTP
1/ Select HTTP → Make an OAuth 2.0 request as the second module
2/ Click Create connection at the very top
- Connection name: YouTube to Notion
- Authorize URL: https://accounts.google.com/o/oauth2/v2/auth
- Token URL: https://oauth2.googleapis.com/token
- Scope → Add item → Item 1: https://www.googleapis.com/auth/youtube.readonly
- Client ID: your client ID
- Client secret: your client secret

3/ Click Save
4/ It will bring you to Google's OAuth page
- Select your account (the one from your YouTube channel)
- Click Allow
5/ Fill out the URL Field with: https://www.googleapis.com/youtube/v3/videos?part=statistics&id=[ID]
- Replace [ID] with the ID property from your Notion database (properties_values → ID → plain_text)
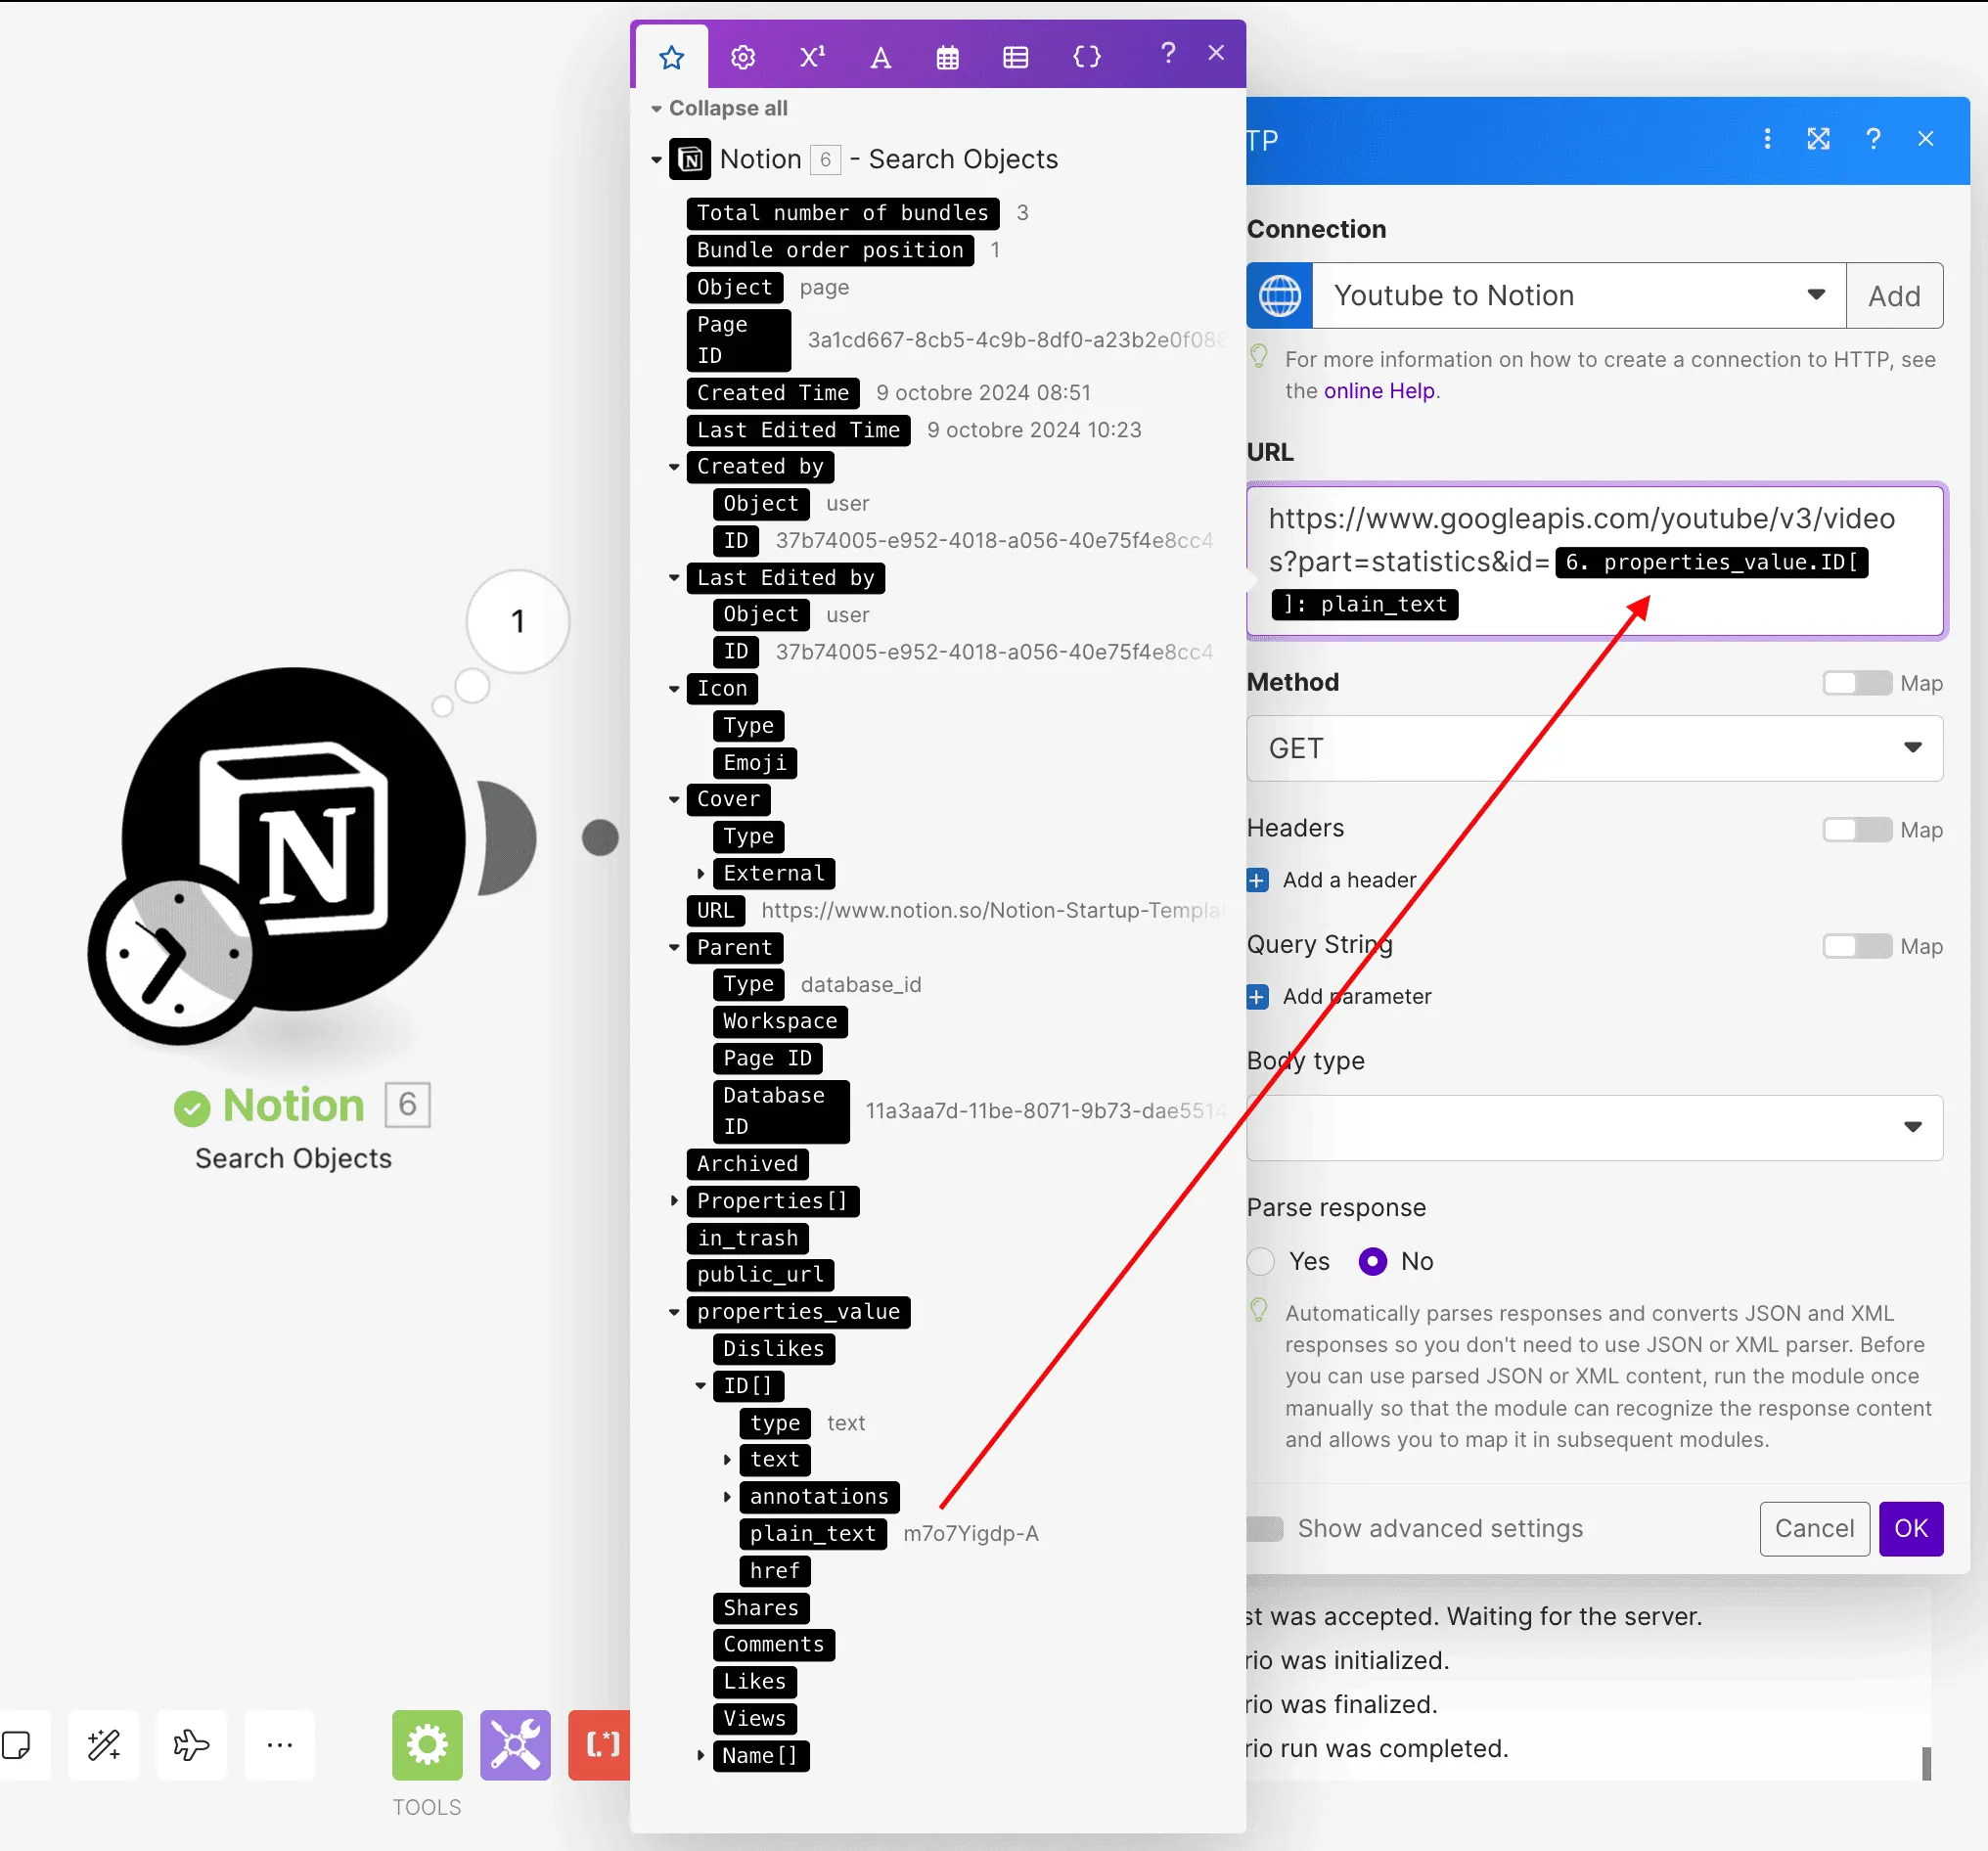
6/ Leave the rest the same & click OK
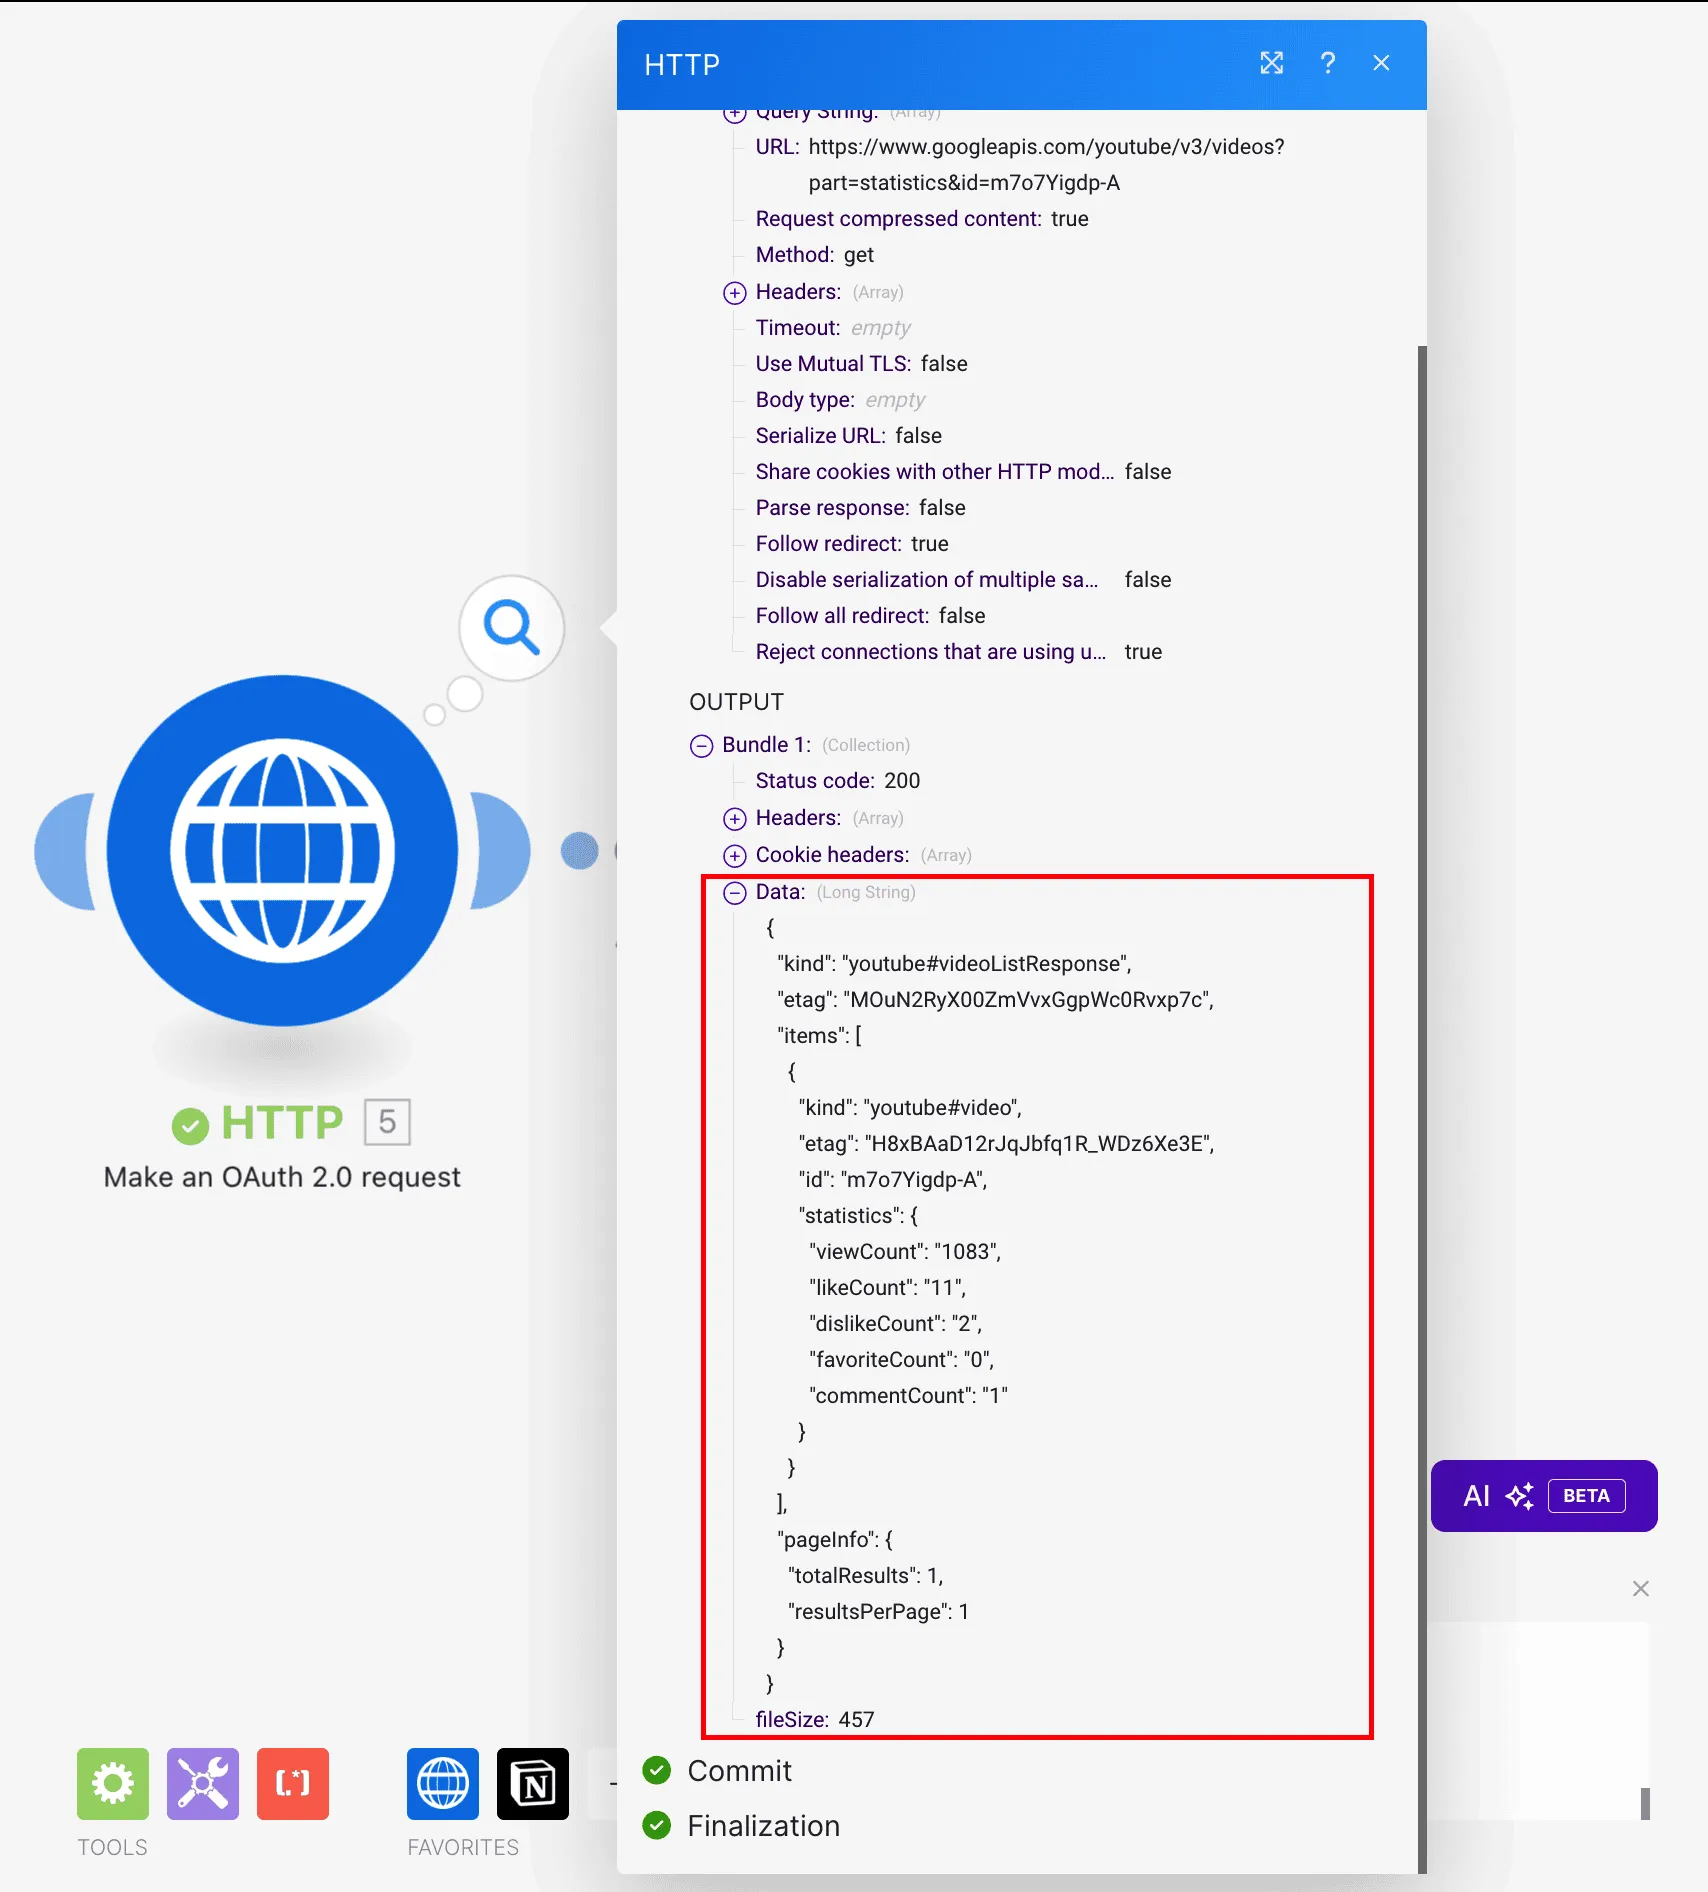
7/ Right-click the module and select Run this module only
- Beneath ID, click Add item
- In the Plain Text field, enter a video ID example from one of your videos
- Click OK
- Verify that you have data in the output
Module 3: Parse JSON
1/ Add a third module after HTTP: JSON → Parse JSON
2/ In the JSON string field, add Data from the HTTP module
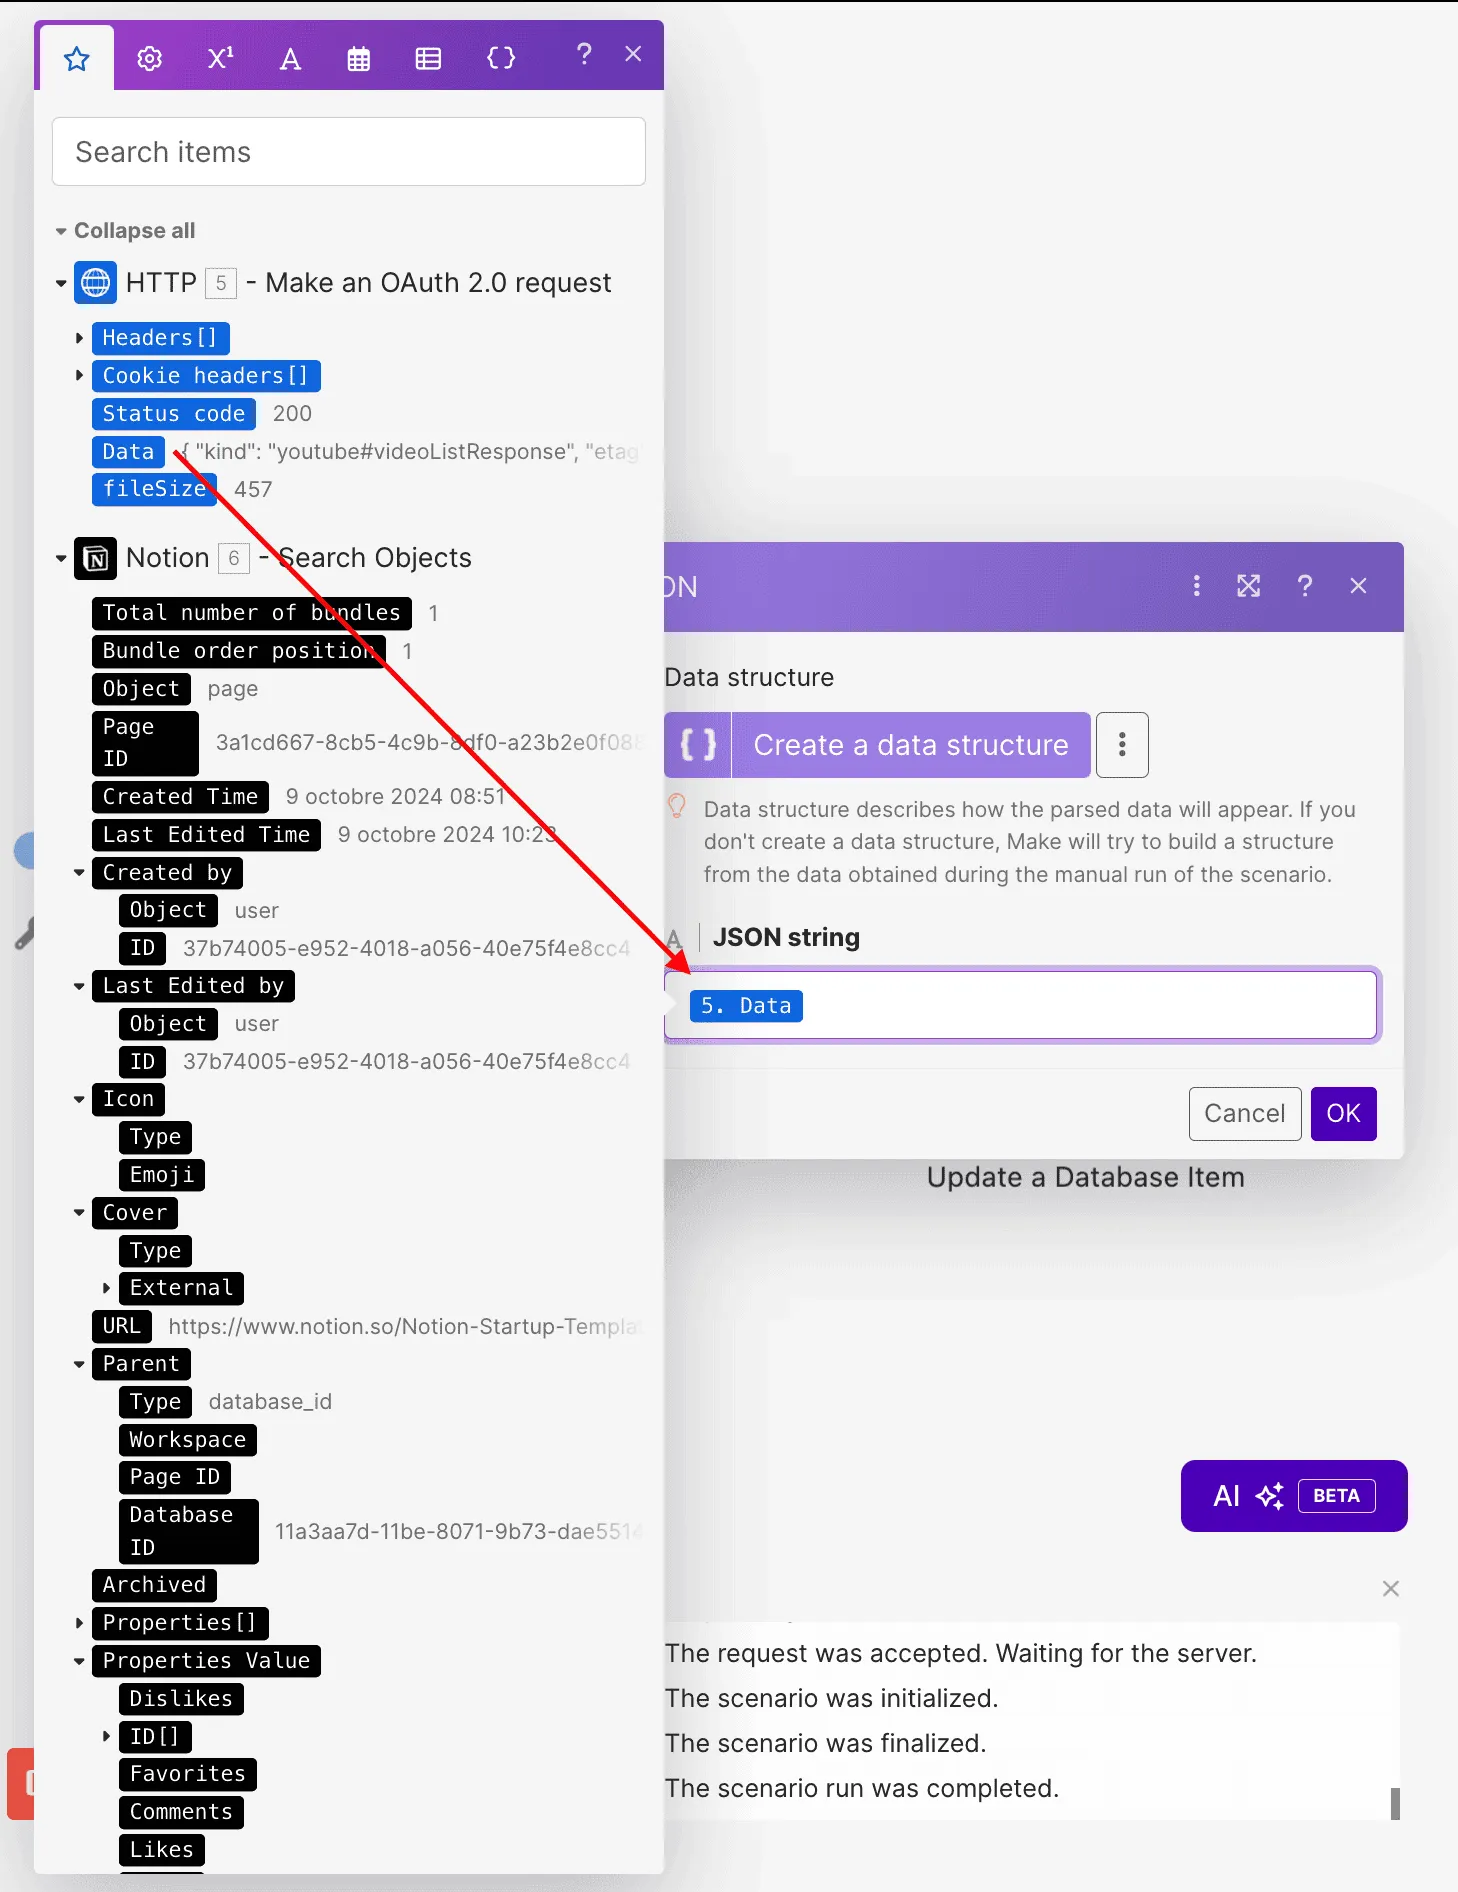
3/ Click OK
Module 4: Notion
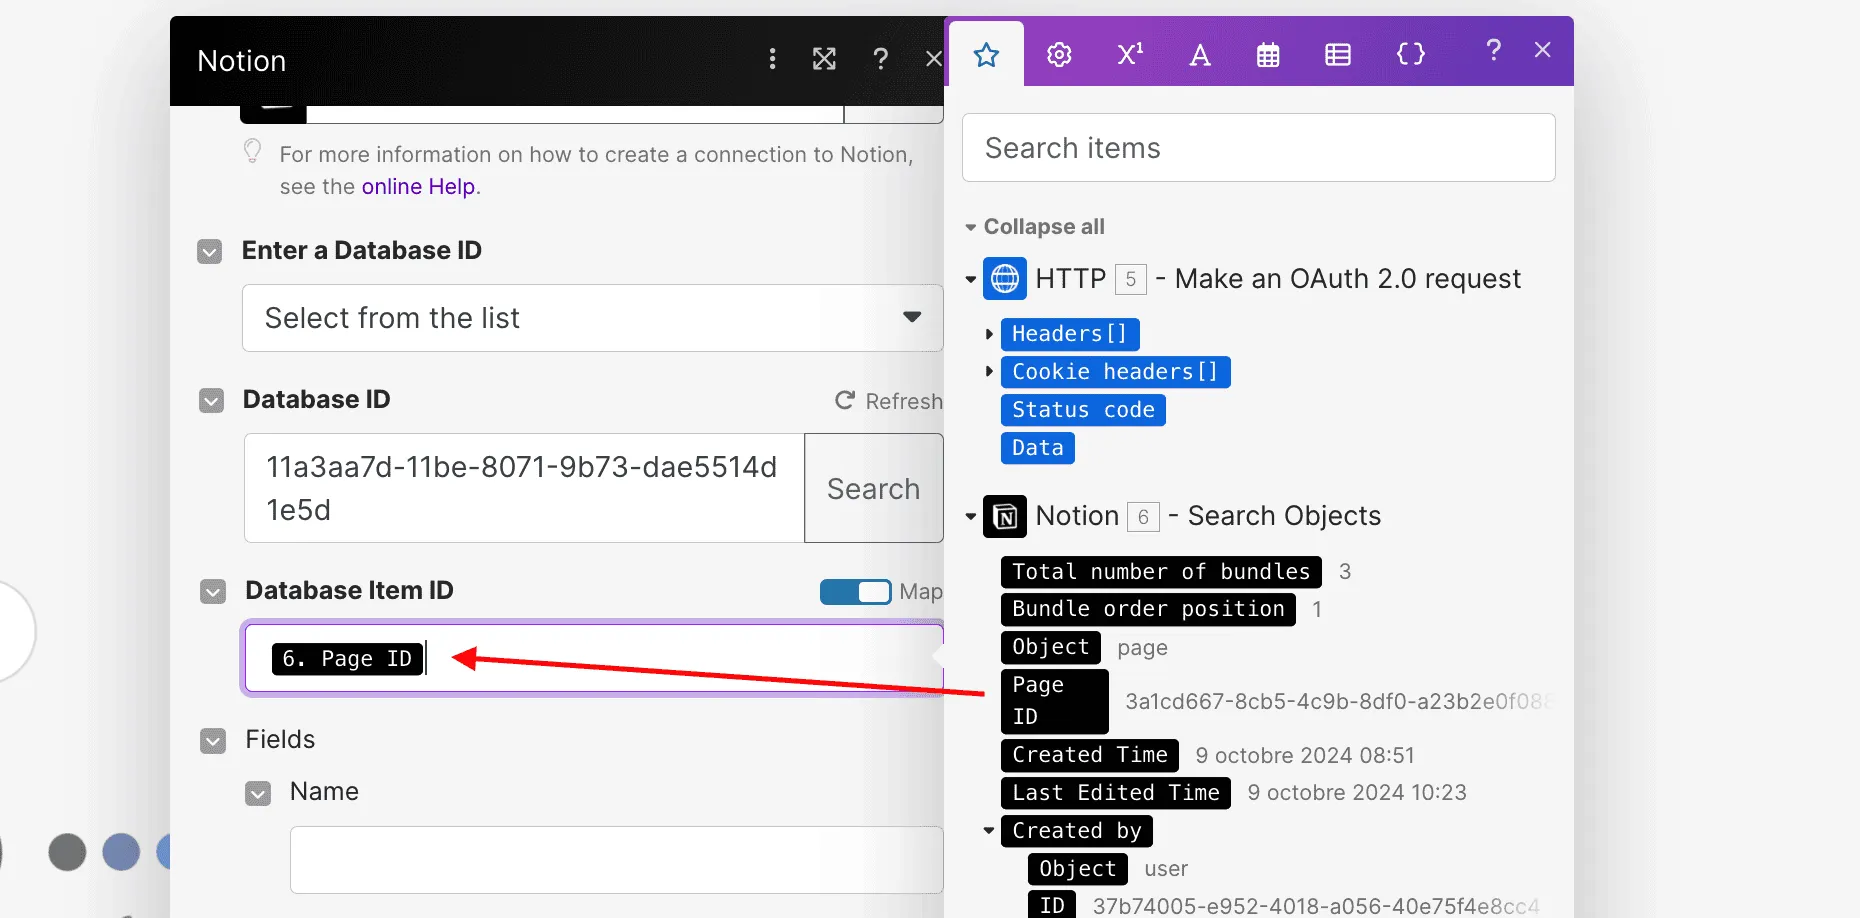
1/ Add a fourth module: Notion → Update a database item
2/ Add the same database id as for the first module
3/ Map Database Item ID with Page ID from the first module
4/ Map your Notion fields from the corresponding ones in the JSON module (items → statistics)
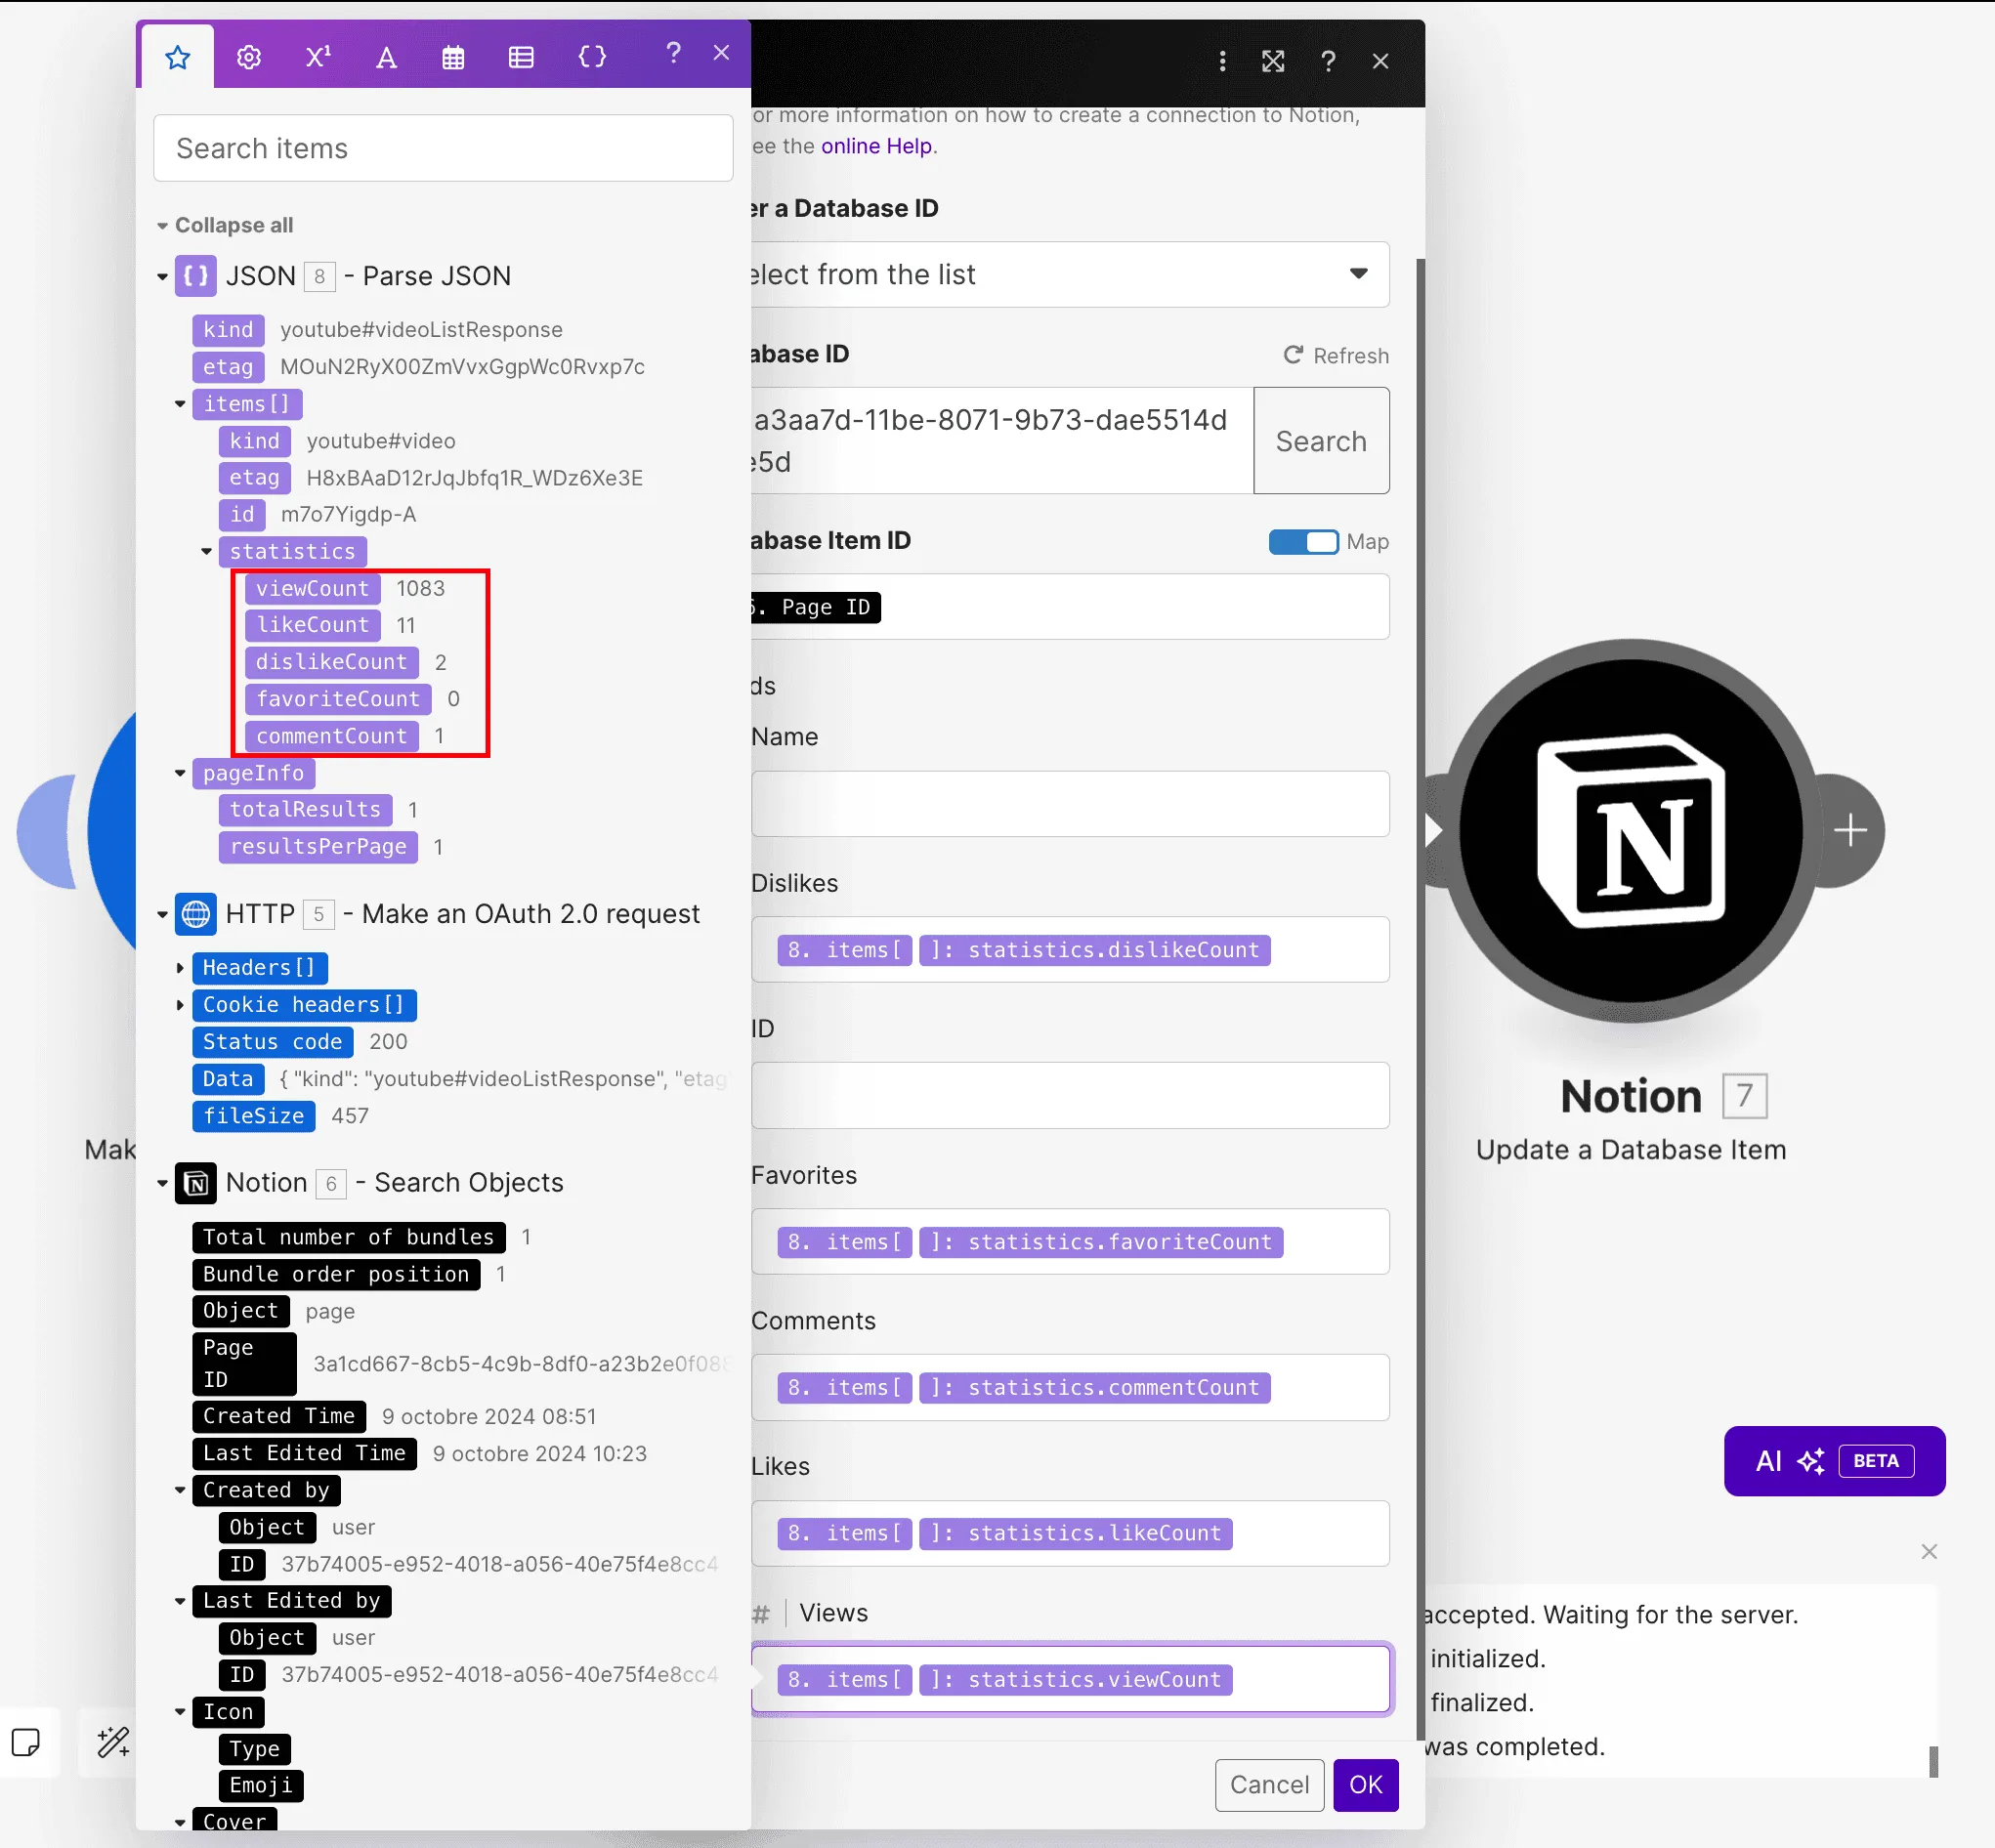
5/ Click OK
Test & Finalize
- Run the scenario
- Verify your Notion database to confirm that the automation successfully updated the statistics properties for the selected item
- If everything works, increase the limit in Module 1 to a number exceeding your current video count. Choose a higher number to accommodate future uploads, eliminating the need for frequent limit adjustments.
- Click the clock on the first module and set up your schedule according to your needs
- Save the scenario
- Click Run once to update all your videos
- Switch the scenario to On
The higher the scheduling frequency, the more operations it will use. I strongly recommend that you select a paid plan and adjust the number of required ops based on your needs (1 video update = 4 operations). You can use up to 1,000 ops/mo on Make's free plan.
Going further
To enhance your YouTube analytics tracking in Notion, you can add a "Last Updated" date property to your database. This simple addition allows you to automatically record when the automation last ran and updated your video statistics. Here's how it works: create a new date property in your Notion database, then go to the fourth module of your Make scenario and map that new date property to now (in the Date & Time tab).
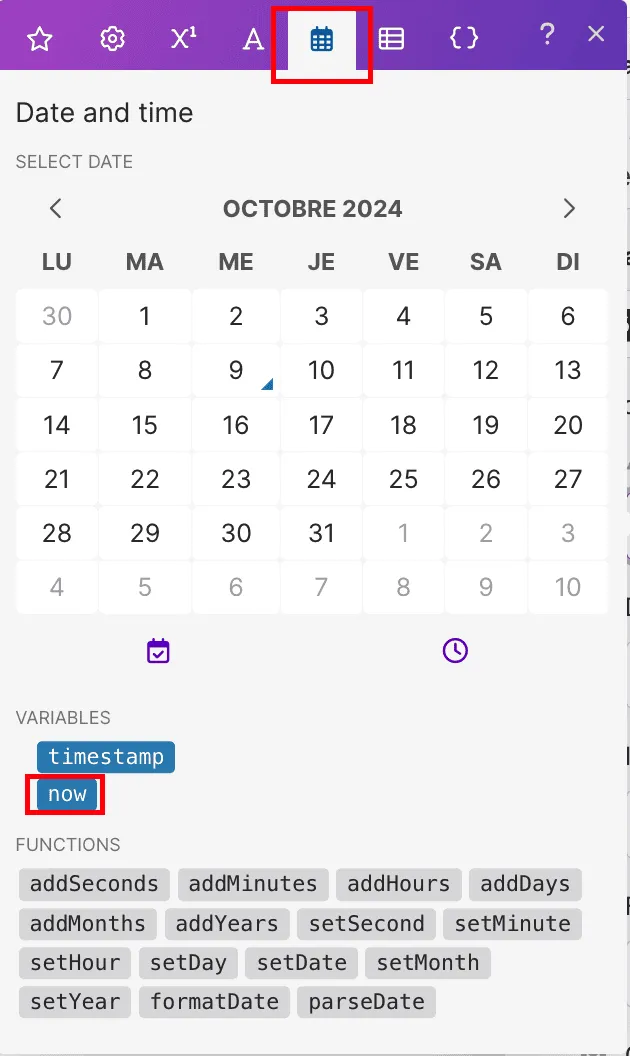
This way, you'll always know exactly how recent your YouTube stats are, helping you make more informed decisions about your content strategy. This timestamp becomes especially valuable when analyzing trends or preparing reports, as it provides context for the data you're reviewing.
Conclusion
By connecting YouTube to Notion, you’ve built a seamless system for tracking your video analytics in one convenient place. Using Google Developers Console and Make, you can now automate the flow of data, saving yourself from manual updates and keeping everything organized.
This setup will not only help you stay informed about your channel’s growth but also allow you to focus on what you do best — creating content. With your YouTube stats automatically updating in Notion, you’ll have more time and clarity to plan your next big video!
Start now & create your Notion account 🙃
(#NotionPartner)
Automating your YouTube video stats tracking can save time and reduce the hassle of manually updating data. It helps you stay focused on content creation while keeping your analytics organized and up-to-date in a central platform like Notion.
By integrating YouTube with Notion, you can centralize all your video performance data in one workspace. This allows you to track metrics such as views, likes, and comments, and organize them alongside your other content management needs, making your workflow smoother and more efficient.
Automating video analytics updates in Notion ensures that your data is always current without manual intervention. This makes it easier to monitor your channel’s performance, spot trends, and make timely decisions, giving you more time to focus on growing your channel.
Latest posts
Friends of Notion


Templates that (truly) work

