
Native Notion Form Builder | Create Form in Notion for Free
Notion recently introduced Forms, a new feature and database view type. Before this, there was no native way to create a form in Notion. You had to rely on third-party tools like Noteforms (formerly NotionForms) or Tally — both of which work great. However, nothing beats a native feature integrated directly into the Notion ecosystem.
In this guide, you’ll learn how to create forms in Notion, gather responses, and customize your form to suit your needs.
Key Takeaways
- Learn how to create forms directly in Notion: Discover how to use Notion’s new native form builder to collect and organize responses effortlessly.
- Explore different question types and options: Get familiar with the 10 question types available, including text, multiple choice, dates, and more.
- Customize and share your forms: Find out how to tweak form settings, change the submit button, add confirmation messages, and share your form with others.
- Automate your workflow with Notion forms: See how to set up automations to tag teammates or take actions when new responses are submitted.
- Use third-party builders for advanced needs: If you need extra customization, check out tools like Noteforms and Tally for deeper integration with Notion databases.
How to Create a Form in Notion
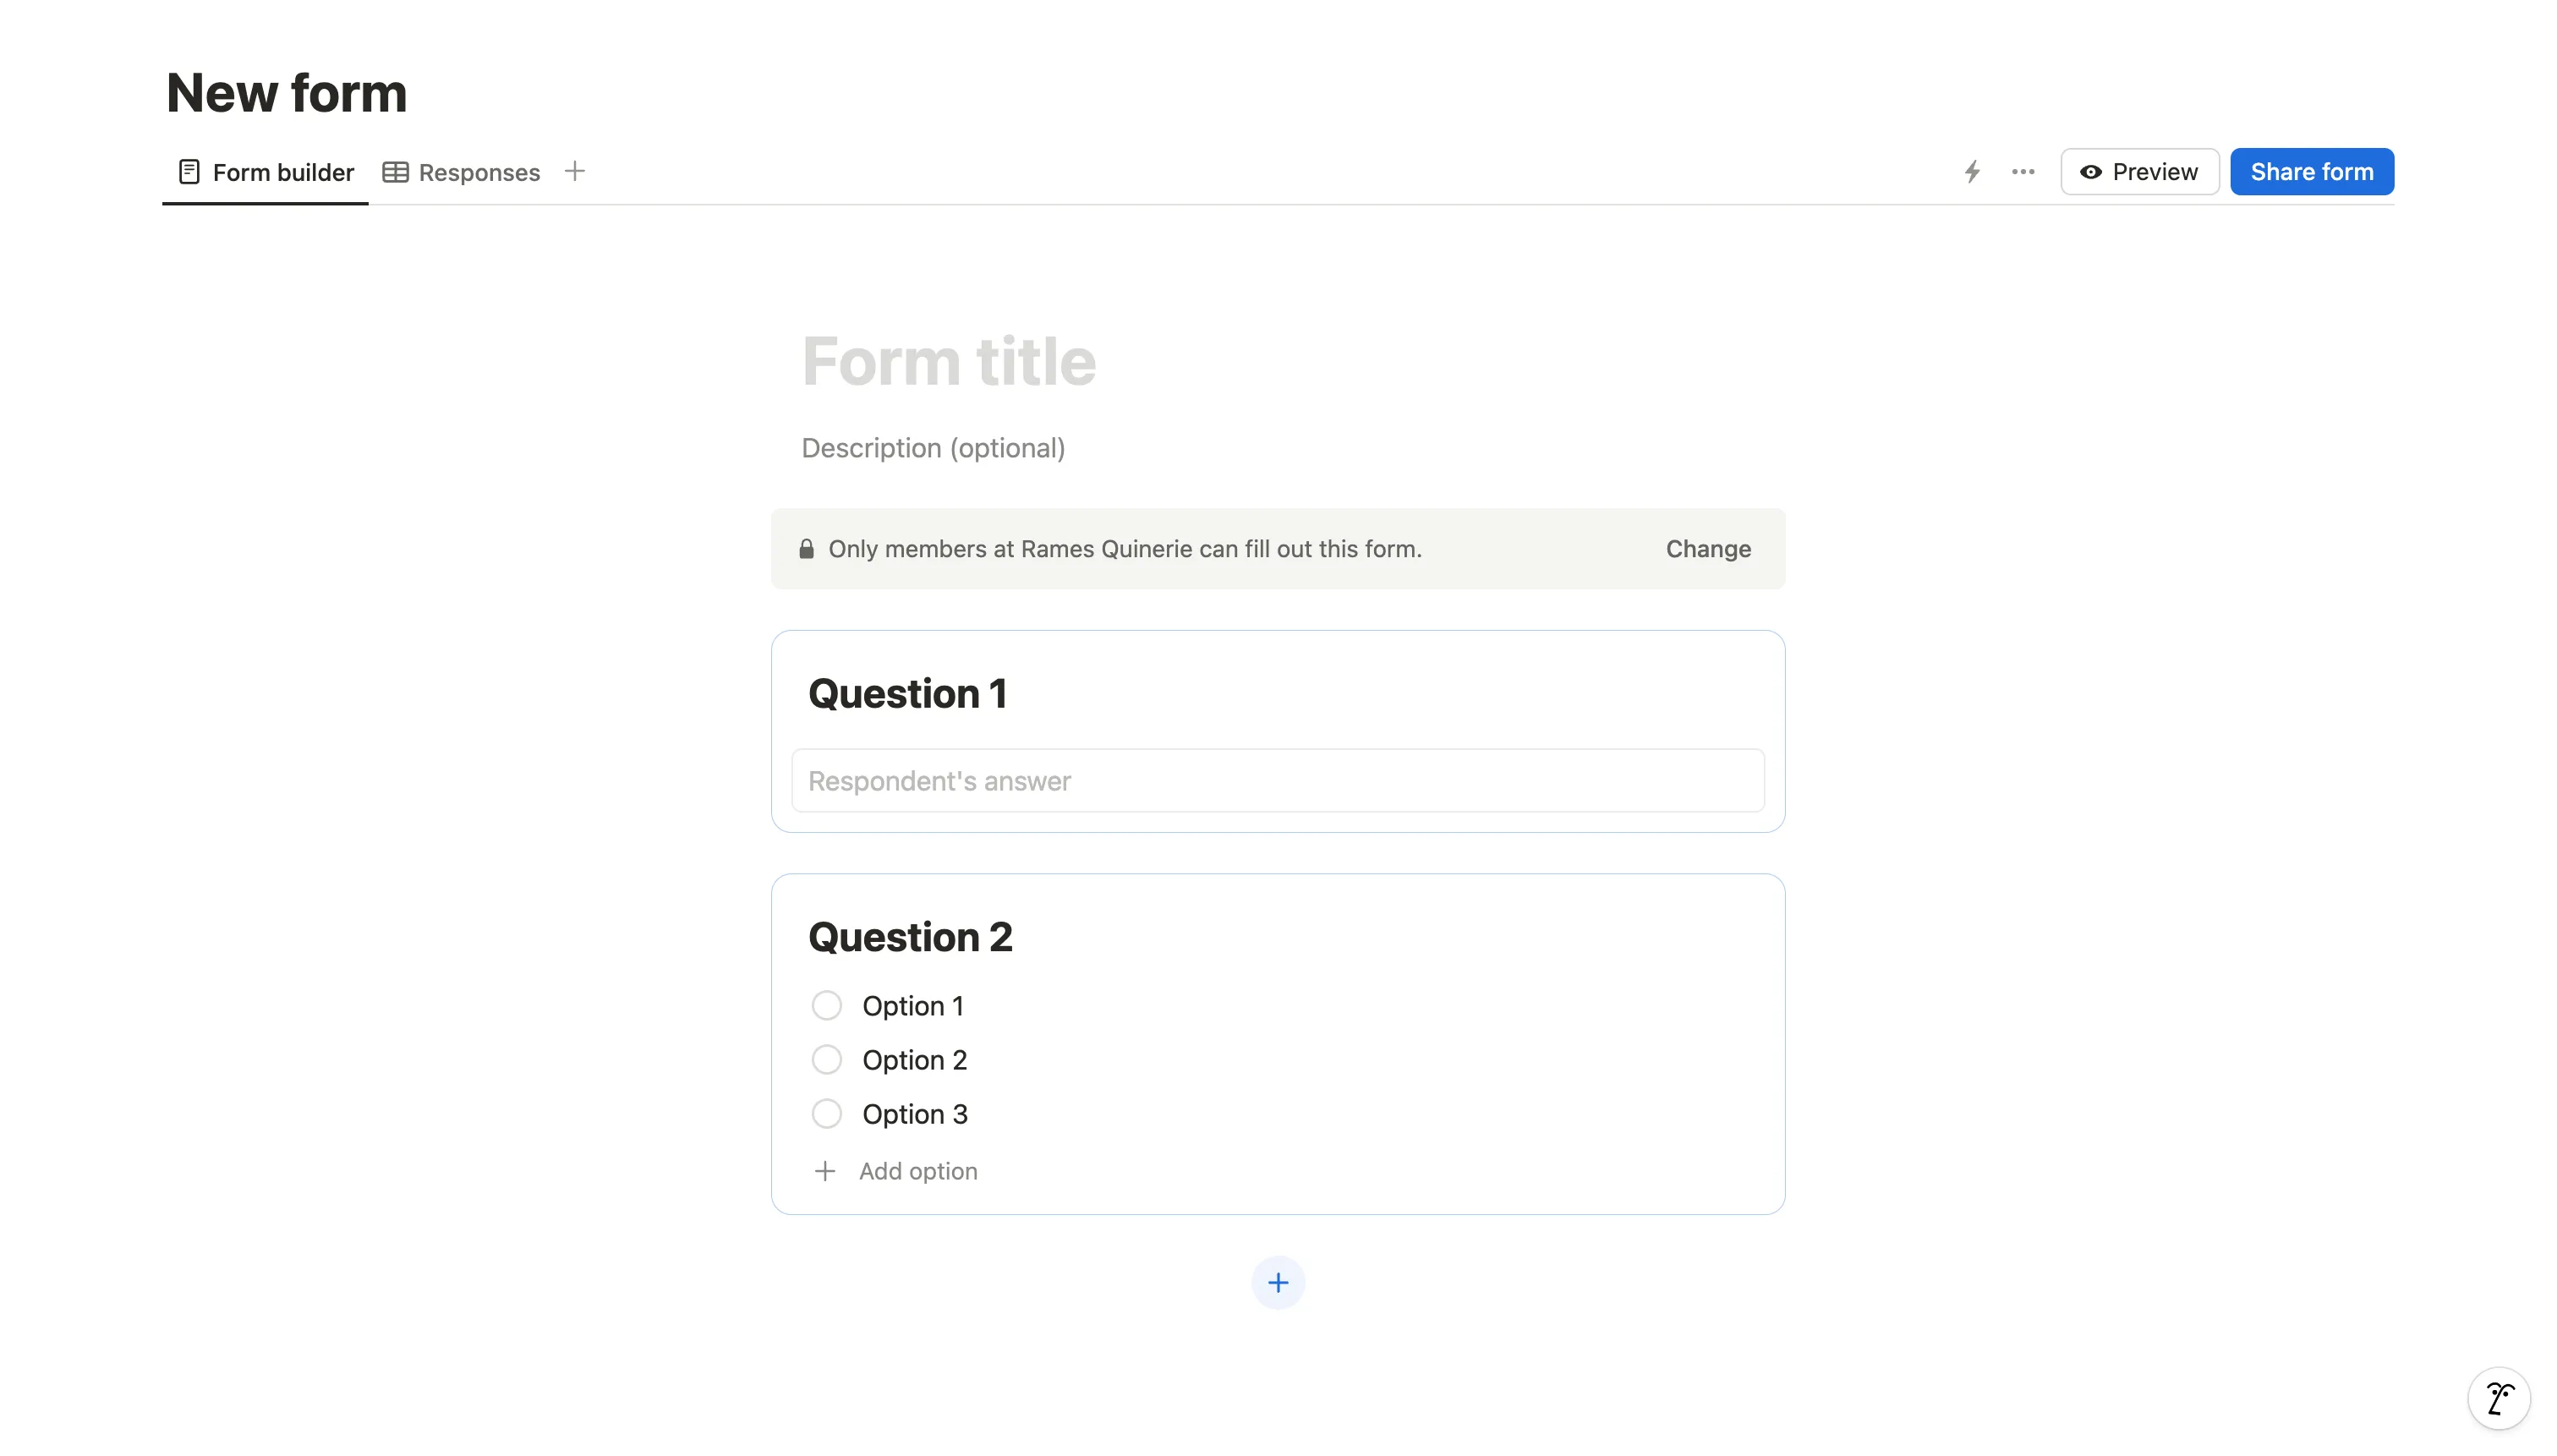
Creating a Notion form is simple:
- Add a new block where you want your form to live.
- Type
/formand press Enter. - This will create a database with two views:
- Form builder (to design your form)
- Responses (a table view for submissions)
By default, responses will sync with the corresponding properties in the Responses view. If you want to stop this syncing, click the question’s options and deselect Sync with [property name].
Question Types in Notion Forms
Notion forms support 10 question types:
- Text → Syncs with a Title or Text property
- Multiple Choice → Syncs with Select or Multi-select
- Date → Syncs with a Date property
- Person → Syncs with a Person property
- Files & Media → Syncs with Files & Media
- Number → Syncs with a Number property
- Checkbox → Syncs with a Checkbox property
- Email → Syncs with an Email property
- URL → Syncs with a URL property
- Phone → Syncs with a Phone property
A Submission Time property is automatically added in the Responses view, serving as a Created Time field. You can edit or remove this just like any other property.
Question Options in Notion Form Builder
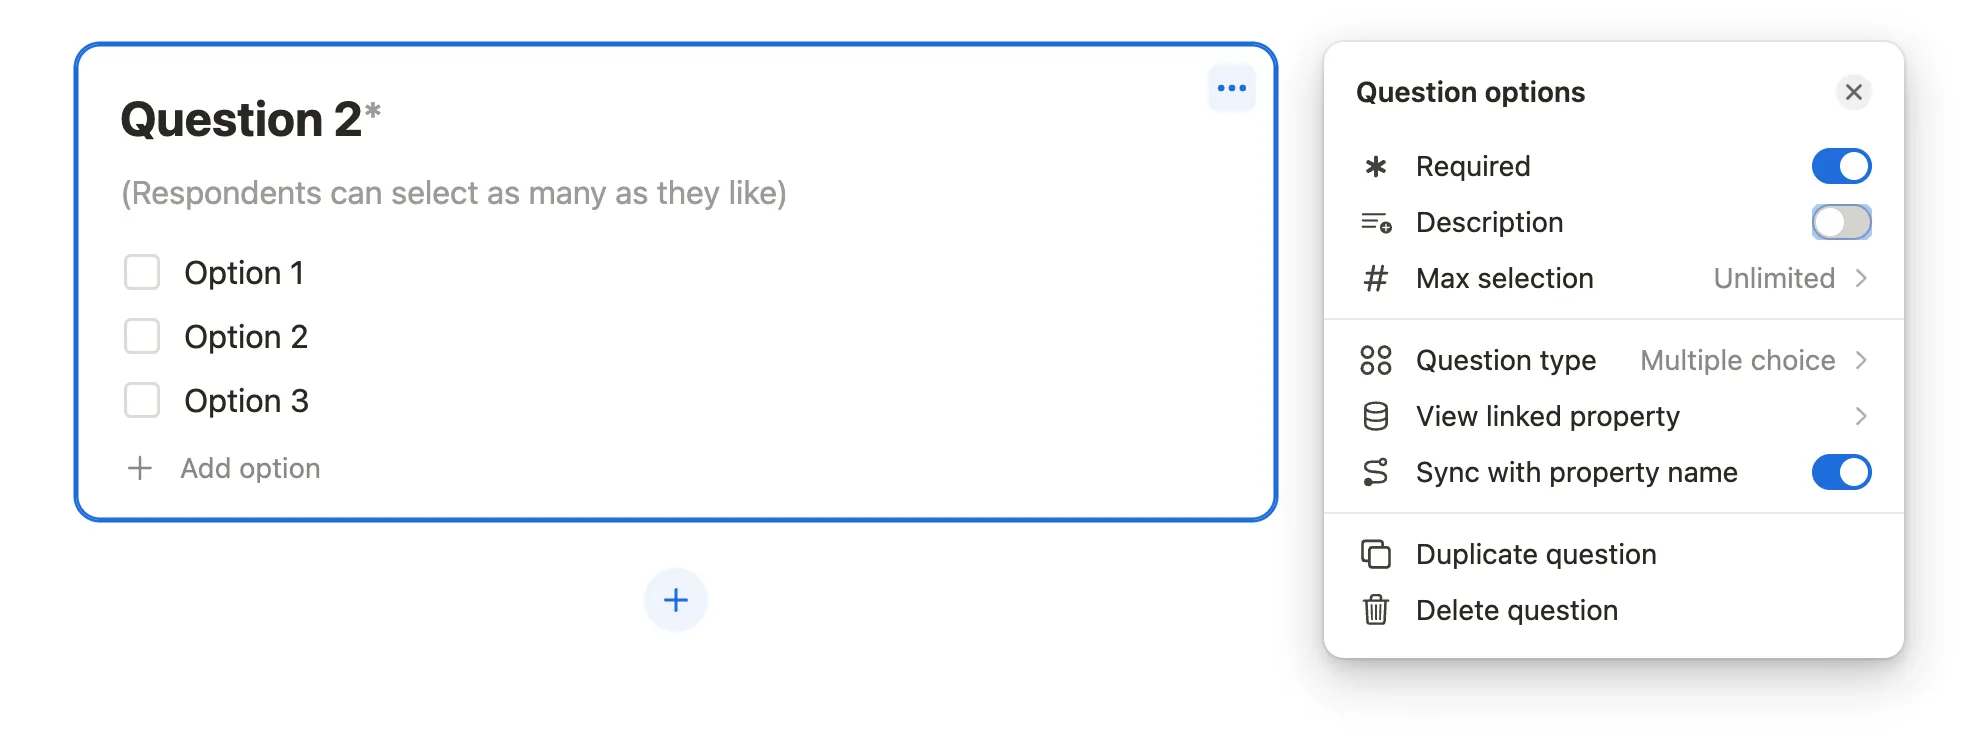
Each question in your form can be customized through the ••• menu at the top-right of the question block. Let’s explore some key options:
General Options (For All Question Types):
- Required: Make the question mandatory or optional.
- Description: Add extra information to help respondents.
- Question Type: Change the question type anytime.
- View Linked Property: See or manage the property associated with a question.
- Sync with [Property Name]: Toggle syncing between form responses and database properties.
- Delete Question: Remove a question from the form.
Text Question Options
- Long Answer: Allow multi-line responses by enabling this option.
Multiple Choice Options
- Max Selection: Choose Unlimited to sync with a Multi-select property or 1 for Select.
- This setting only appears if the question is linked to a Multi-select property.
Date Question Options
- End Date: Enable respondents to select a time range (start and end date).
- Include Time: Allow respondents to add time to the date selection.
If enabled, the user must provide both an end date and time—partial inputs are not allowed.
Person Question Options
- Max Selection: Limit selections to one person or allow unlimited choices.
Respondents can pick anyone in your workspace, whether members or guests.
Other question types
Other question types have fewer customization options, but here are a few things to note:
- Files & Media: Allows up to 10 uploads, capped at 100 MB total.
- Checkbox: Functions as a single boolean field (true/false).
- Number: While the format can’t be set in the form, it can be adjusted within the database.
Steps to Create Your Notion Form
- Name your form (this is separate from the Responses view).
- Add an optional description.
- Add your questions and configure them:
- Choose a question type.
- Decide if it should sync with property names (enabled by default).
- Adjust each question’s options (such as setting it to required).
- Review the Responses view to ensure all properties match your form questions. You can rearrange properties as needed.
Pro Tip: To insert a new question between existing ones, hover between two questions and click the blue + icon. You can also drag and drop questions to reorder them.
Customize Your Form in Notion
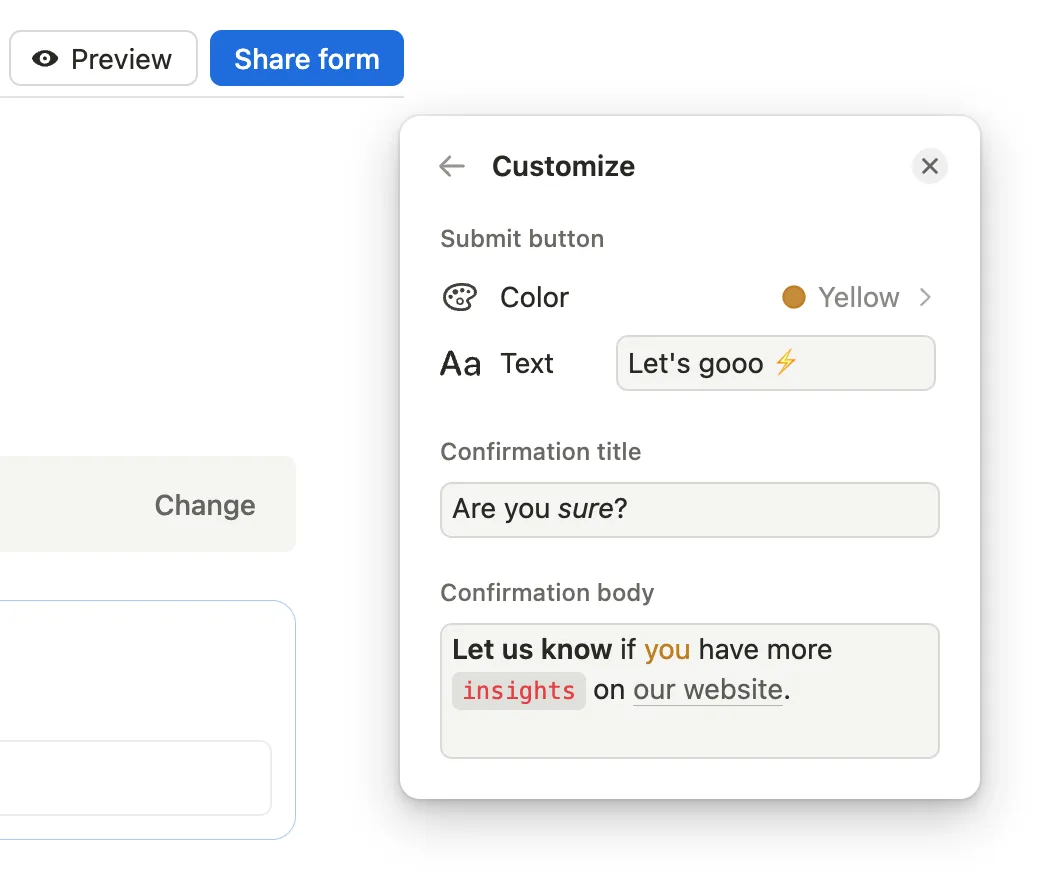
Once your questions are ready, it’s time to personalize the form. Click ••• at the top-right of the Form database and select Customize Form. You can:
- Change the submit button color (limited to Notion’s default palette).
- Edit the submit button text.
- Add a confirmation title with formatting options (bold, italic, hyperlink, etc.).
- Write a confirmation message to display upon submission.
Confirmation title and body will be displayed once the form is submitted.
Preview Your Form
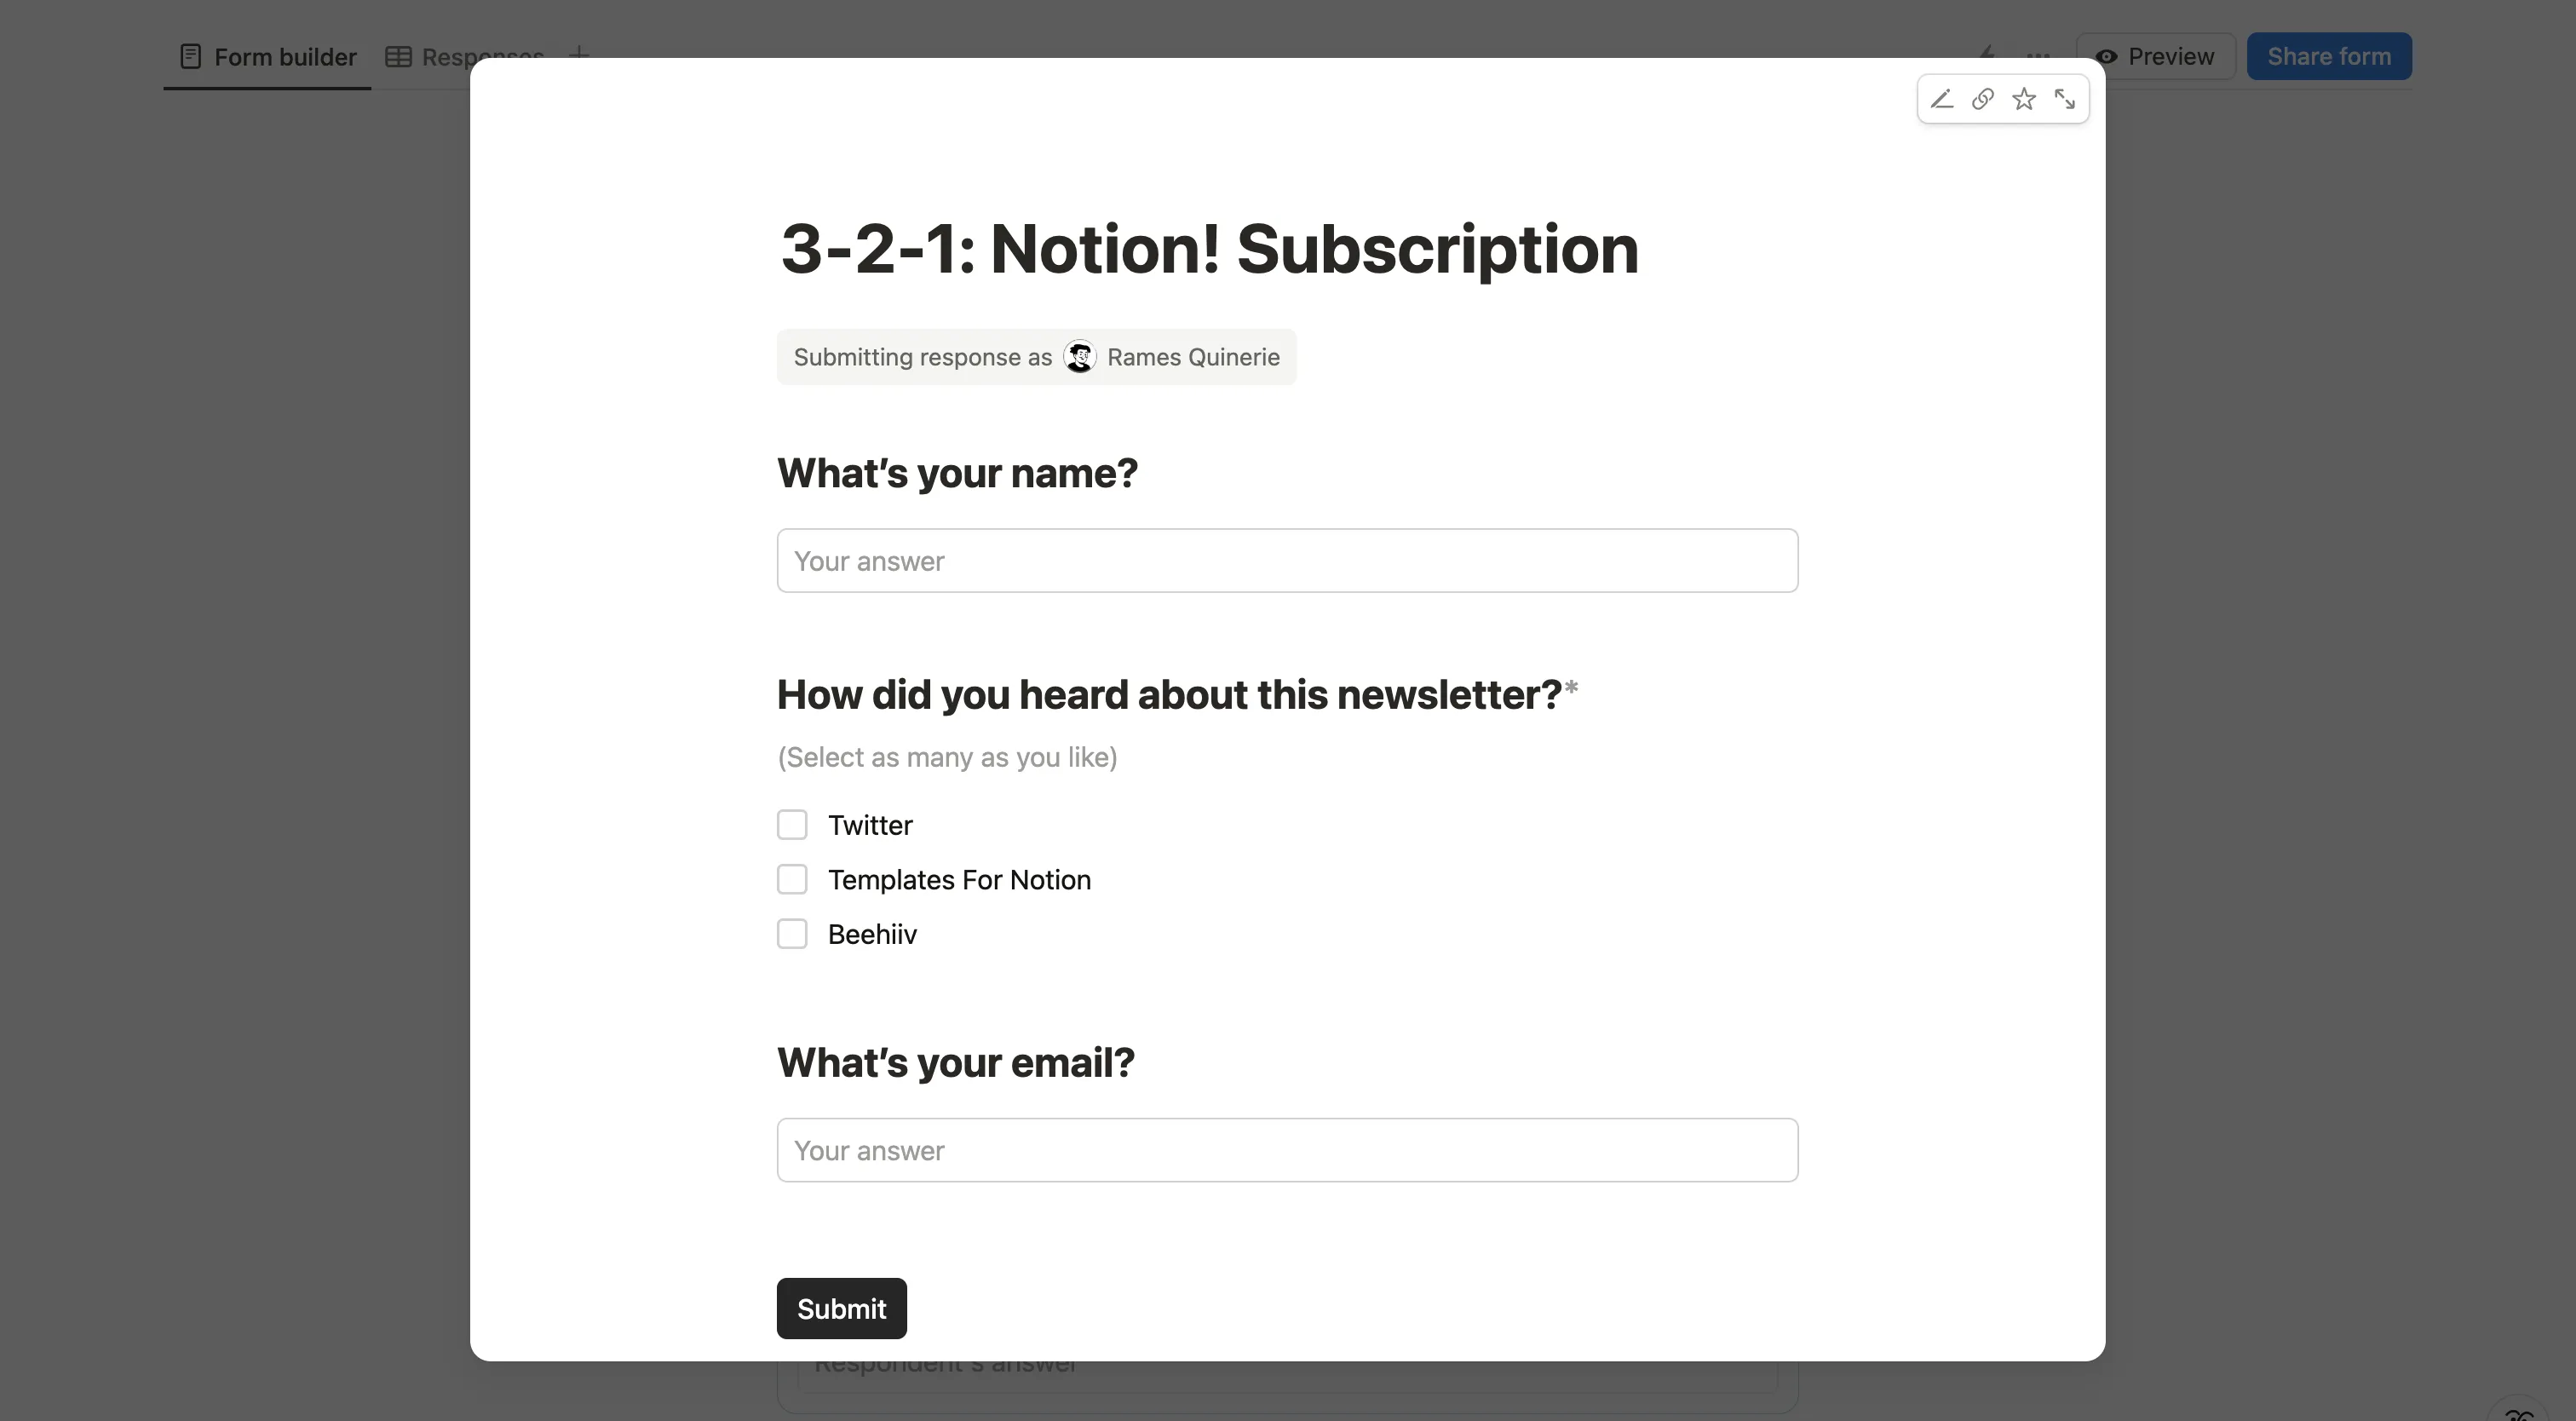
Before sharing, preview your form to ensure everything looks right.
- Click the Preview button at the top of the database.
- Fill out the form with test data and submit it.
- Review the recorded responses in the Responses view.
- Click View my answers to double-check submission accuracy.
Even in preview mode, all responses will be saved to the database.
Share Your Notion Form
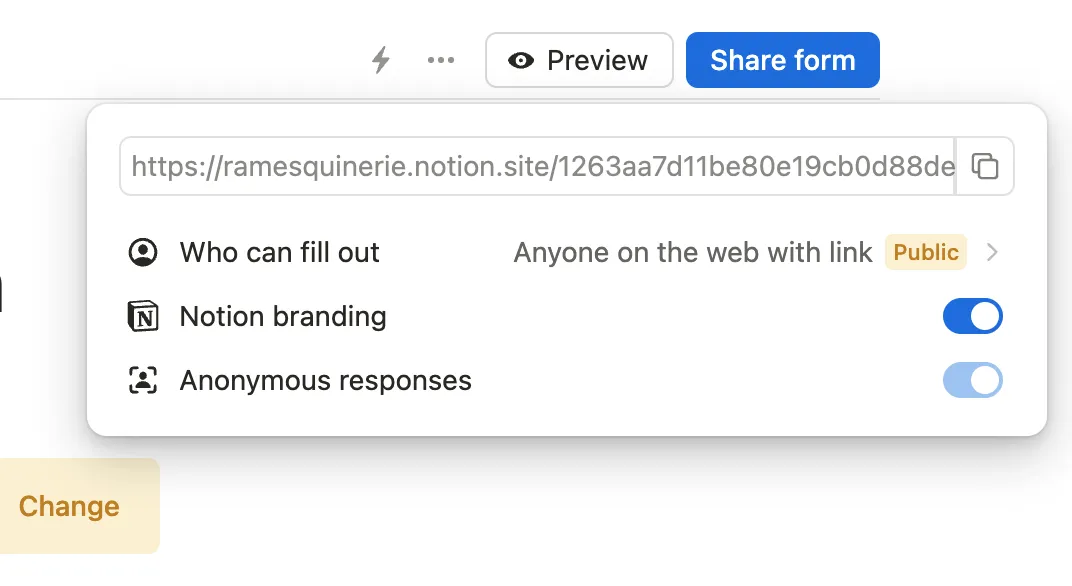
Once satisfied, follow these steps to share your form:
- Click the Share Form button.
- Choose Who can fill out the form:
- Anyone at [your workspace] with link
- Anyone on the web with link
- No access (to close submissions)
- Toggle Anonymous responses on/off. If sharing with Anyone on the web, responses are recorded as anonymous by default.
- Enable/disable Notion branding if sharing publicly.
- Copy the form link from the top of the share menu.
You'll receive an email notification each time someone submits your Notion form.
Automate Your Notion Form
You can leverage Notion automations to enhance your form’s functionality. For example, you could tag yourself or a teammate whenever a new response is recorded.
Here’s how:
- Create a new automation and give it a name.
- Set the Trigger to “Page added.”
- Choose Action → Edit property → [Person property] → Replace with → [Teammate’s name].
You can automate many more things. For more ideas, check out this automation tutorial.
Create a Form from an Existing Notion Database
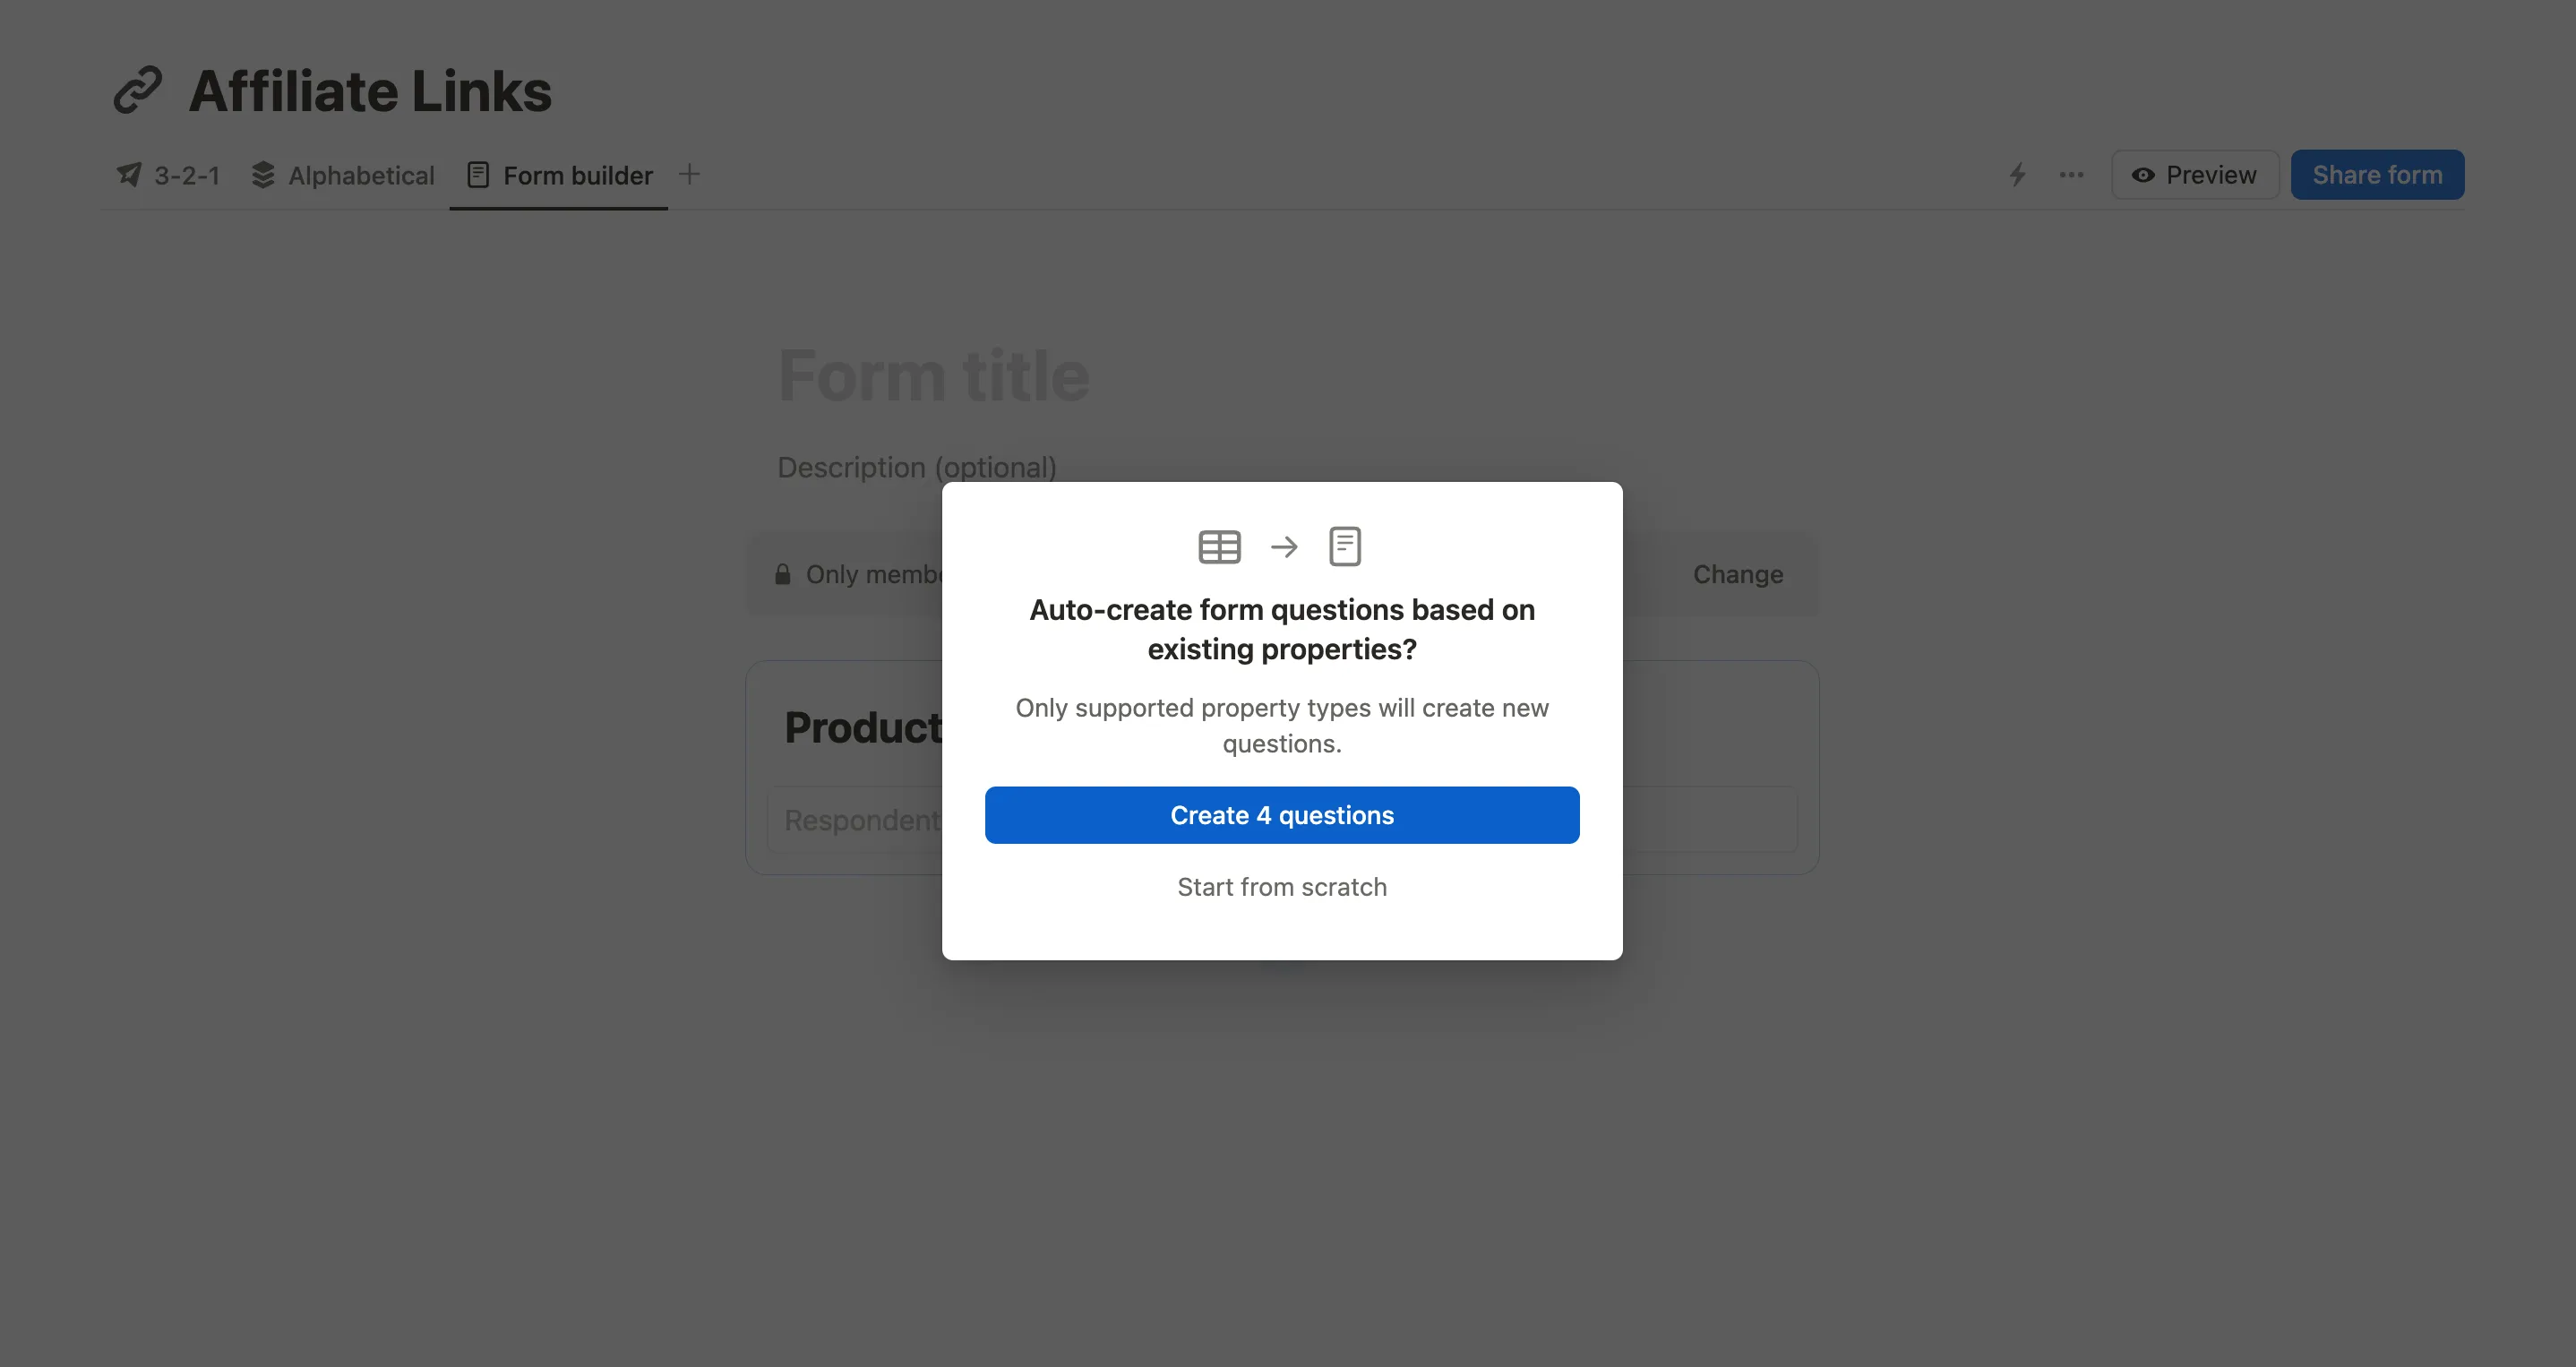
If you already have a database, you can create a form view from it instead of starting from scratch:
- Open the database you want to use.
- Add a new view and select Form.
- Choose whether to use existing properties as form questions.
- Rename questions if needed (this will update the original property names). Alternatively, use descriptions to provide extra context.
Notion Form Builders: External Options
If the native Notion forms don’t meet your needs, you can try third-party form builders that sync directly with Notion.
Noteforms (formerly Notion Forms)
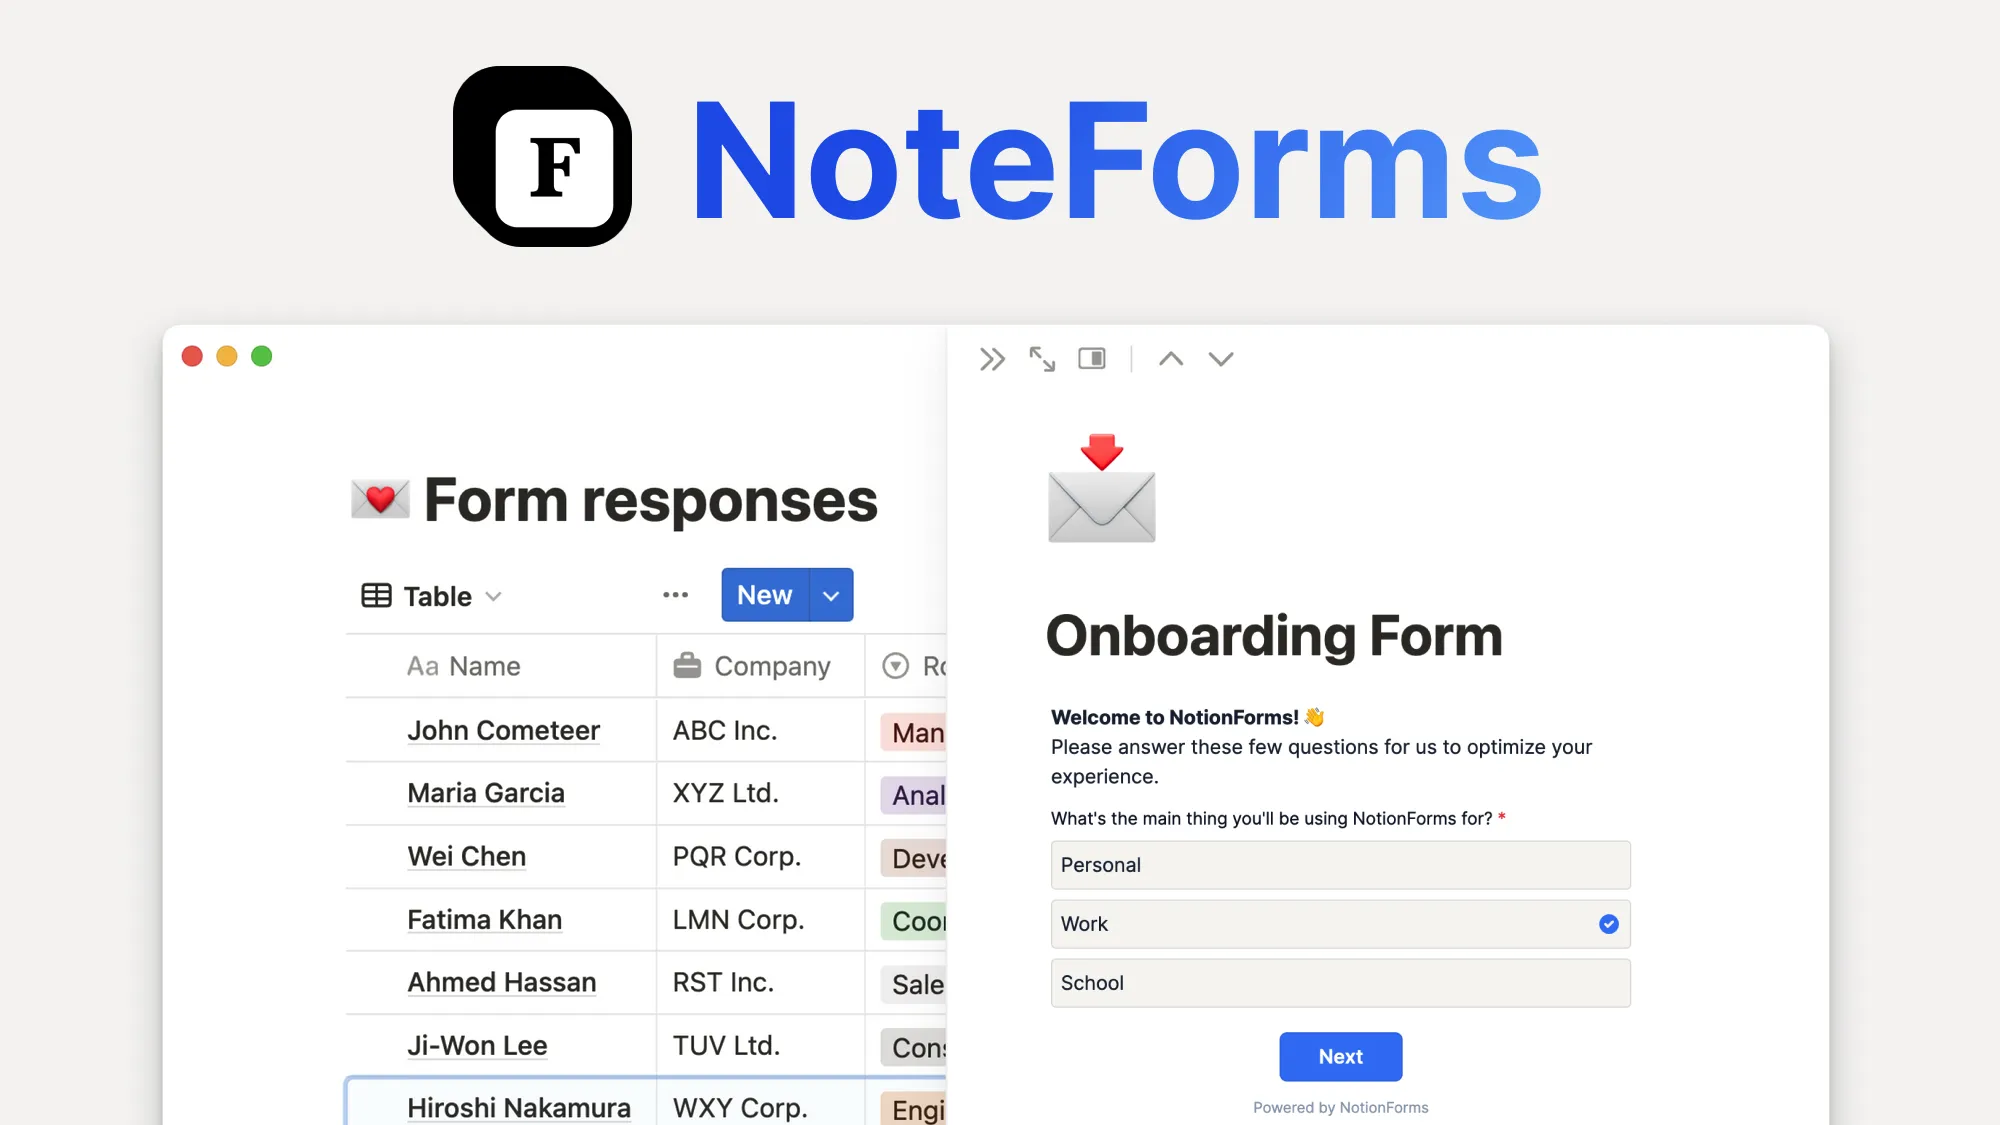
Noteforms is probably the most well-known and widely used form builder for Notion. It's incredibly user-friendly:
- Connect your Notion workspace.
- Select your database.
- Adjust properties by hiding or displaying them.
- Customize the form and share it.
Noteforms also allows you to create filtered database views that can be shared publicly.
Tally
Tally mimics Notion’s interface and allows / commands to add questions.
- Create your form and add questions.
- Click the ⚡ icon to open integrations.
- Connect Notion and select a database.
- Map Tally questions to Notion properties.
Tally forms can be embedded directly into Notion pages, looking almost identical to native forms.
Conclusion
With the new native form builder, creating forms in Notion has never been easier. Whether you’re gathering feedback, tracking registrations, or automating workflows, Notion forms let you collect and manage data seamlessly within your workspace.
While third-party tools like Noteforms and Tally offer more customization, the built-in option makes it convenient to sync responses directly with your databases. Now that you know how to create, customize, and share your forms, you’re ready to streamline your processes and unlock new ways to manage your data in Notion.
Happy form-building!
FAQ
What happens if I delete a question in Notion Form after I've already received submissions?
If you delete a question, the related property won't be deleted. However, be aware that unlike classic Notion databases, you currently can't retrieve deleted questions.
What happens when you edit a property linked to a question in the Notion Form's Responses view?
It also updates the property in the Form. For instance, if you change your select to multi-select, it will adjust the Max selection from 1 to unlimited.
Does editing a question title change the property name in Notion Form?
Yes, editing your question name will update the property name accordingly. However, you can reverse this by editing the property name—this won't affect the question name.
Can I create a Notion Form from an existing Notion database?
Absolutely! Here's how: Access your database source → Click to add a new view → Select "Form" → Choose the first option to use existing properties as your form questions. Your form questions will automatically link to your Notion properties.
Start now & create your Notion account 🙃
(#NotionPartner)
Absolutely! Here's how: Access your database source → Click to add a new view → Select "Form" → Choose the first option to use existing properties as your form questions. Your form questions will automatically link to your Notion properties.
Yes, editing your question name will update the property name accordingly. However, you can reverse this by editing the property name—this won't affect the question name. If you delete a question, the related property won't be deleted. However, be aware that unlike classic Notion databases, you currently can't retrieve deleted questions.
It also updates the property in the Form. For instance, if you change your select to multi-select, it will adjust the Max selection from 1 to unlimited.


